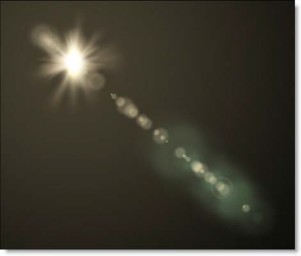
NEW IN CONTINUUM 2021, the BCC+ Lens Flare filter adds photo-realistic lens flares to a scene. Lens flares are produced by the scattering or flaring of light within a lens when pointed into a bright light. Although an image aberration, lens flares can be added for dramatic effect and are created by combing the following elements: Caustic, Chroma Bands, Chroma Ring, Circle, Circles, Disc, Edge Streak, Ellipse, Fan Rays, Hot Spot, Polygon, Polygons, Radial Streaks, Random Spikes, Ring, Spikes, Spiral Rays, Star, Star Caustic, and Stripe.
Presets and the FX Editor
The FX Editor provides a convenient way to store and retrieve factory installed and/or user generated filter presets. To select a preset, open the FX Editor interface and pick one from the Presets panel. Click the apply button in the FX Editor to return to the host user interface.
To save a custom preset, click the “Create Custom Preset” icon in the top right corner of the parameter list, next to the filter name, set a name for the new custom preset in the dialog that appears and click done.
Elements
-
 Caustic
 -
 Chroma Bands
 -
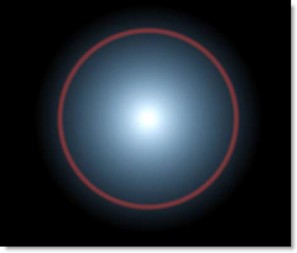
 Chroma Ring
 -
 Circle
 -
 Circles
 -
 Disc
Disc -
 Ellipse
 -
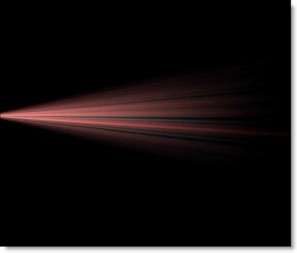 Edge Streak
 -
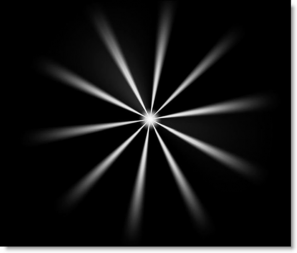
 Fan Rays
 -
 Hot Spot
 -
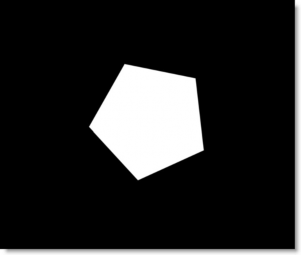 Polygon
 -
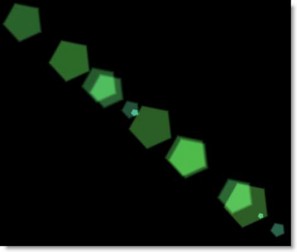 Polygons
 -
 Radial Streaks
 -
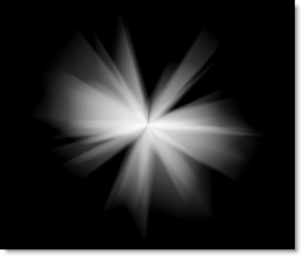
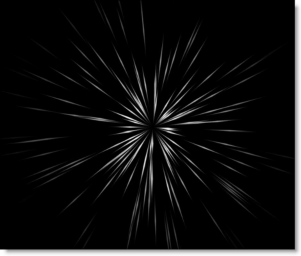
 Random Spikes
 -
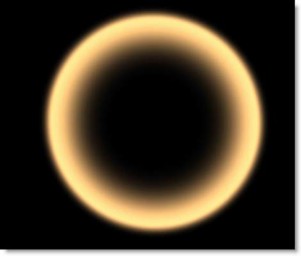
 Ring
Ring -
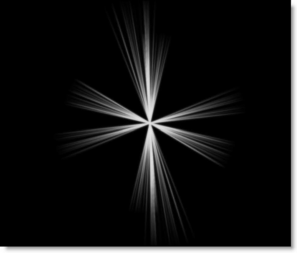
 Spikes
 -
 Spiral Rays
 -
 Star
Star -
 Star Caustic
 -
 Stripe
 -
Caustic: Simulates an optical distortion created by the envelope of light rays reflected or refracted by a curved surface.
-
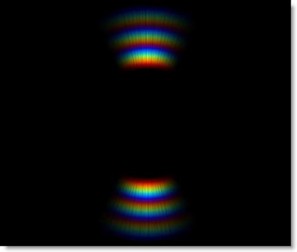
Chroma Bands: Creates rainbow diffraction patterns.
-
Chroma Ring: Rainbow lines that emanate from the center of the light source.
-
Circle: An individual circle.
-
Circles: Creates a specified number of random circles often seen in lens flares.
-
Disc: Generates a circular ramp with individual control of the inner, middle and outer areas.
-
Ellipse: Ellipse is similar to Disc, but elliptical in shape.
-
Edge Streak: Caused by a light source at the edge of the frame reflecting off of the shiny lens aperture. It only appears when the light source is positioned outside of the frame.
-
Fan Rays: Generates asymmetric fanned rays.
-
Hot Spot: Utilized in most lens flares, glow ball simulates the circular glow created when a light source interacts with a lens.
-
Polygon: An individual polygon.
-
Polygons: Creates a specified number of random polygons. These are reflections caused by light interacting with the lens’s polygonal bladed aperture.
-
Radial Streaks: Short radial streaks emanating from the center point.
-
Random Spikes: Generates asymmetric radial rays.
-
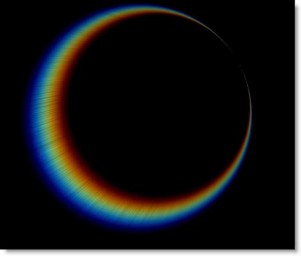
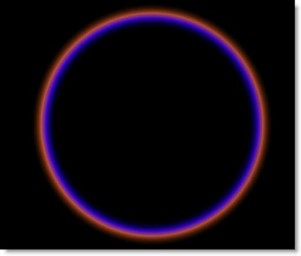
Ring: A rainbow ring that fades as it is moved to the edges of the screen.
-
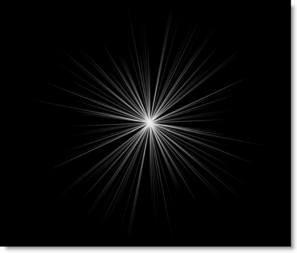
Spikes: Long radial rays emanating from the center point.
-
Spiral Rays: Creates spiral rays.
-
Star: A star pattern is created when light reflects off the intersection of the lens’s aperture blades.
-
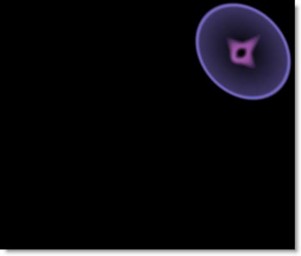
Star Caustic: A star shaped caustic created by the envelope of light rays reflected or refracted by a lens’s reflective coatings.
-
Stripe: A tapered stripe that simulates anamorphic lens flares.
Filter Parameters
Edit Flare
Click the Edit Flare button to edit the current preset or to create a custom lens flare. The Flare Editor interface consists of a Viewer, Parameters, Global, Flare (currently used flare elements) and Elements (all available elements).
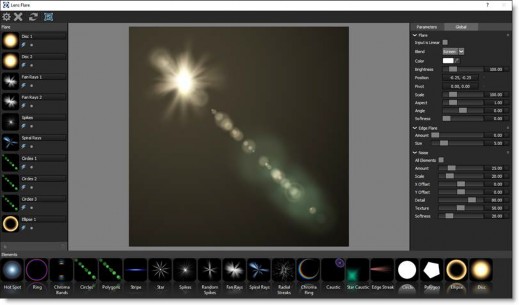
User Interface
Toolbar: The Toolbar contains Done, Cancel, Reset, and Show Image icons.
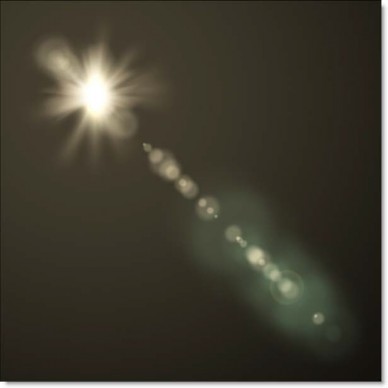
Viewer: The Viewer displays the composite of all added flare elements.
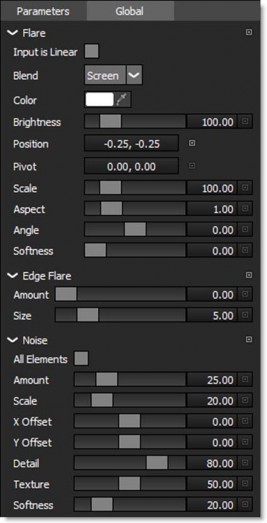
Parameters and Global: Parameters and Global share the same window space on the right side of the screen, with Global shown as the default. Either Parameters or Global are selectable in a tab at the top of the window.
Elements: The Elements window displays lens flare building blocks to be used in the creation of a flare.

Flare: The Flare window displays all elements that make up the current lens flare.
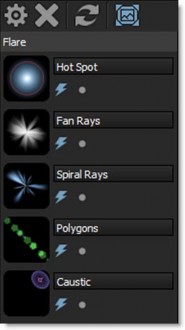
Enable (E): Enables and disables the element.

Solo (S): Displays only the soloed element.

Working With Elements
Select Elements: Select elements using the Shift or Ctrl(Win)/Cmd(Mac) keys.
To Add Elements to the flare:
- Double-click an element in the Elements window and it is added to the end of the stack in the Flare window. If an element is selected in the Flare window prior to the double-click, the new element is added after the selection.
- Drag and drop from the Elements window to the Flare window or Viewer. Multiple selected elements can be dragged and dropped simultaneously.
To Delete Elements from the flare:
- Press the Delete key or
- Click the Delete Element icon at the bottom of the Flare window.

To Duplicate elements:
- Duplicate selected elements using the Duplicate Element icon at the bottom of the Flare window.

Edit Elements
- Select an element in the Flare window and it’s controls are displayed in the Parameters window.
- When multiple elements are selected, the controls for all selected elements are displayed in the Parameters window.
- Click and drag the point controls in the viewer to move the flare around.
- Ctrl(Win)/Cmd(Mac)-click and drag in the viewer to move the selected elements along the flare line.
Moving Elements In The Flare Window
- Drag the icon of an element to a new position in the stack. Multiple elements can be moved at once.
Rename Elements
- Click in the element text box and type to rename it.
Flare
Input is Linear: Enable this if your image is in true linear color space. Gamma corrected images should have this parameter disabled.
Blend: Determines the blend mode used to composite the lens flare.
- Add: The lens flare is added to your image.
- Screen: The lens flare is combined with the image using a Screen blend mode. This looks kind of like the Add blend mode, but highlights are retained.
Color: Sets the color.
Brightness: Controls the brightness.
Position: Adjusts the origin of the lens flare.
Pivot: Changes the end position of the lens flare.
Scale: Determines the size.
Aspect: Sets the aspect ratio.
Angle: Sets the angle.
Softness: Blurs the lens flare.
Occlusion
The Occlusion parameters allow you to block the lens flare. Using a source input, the brightness of the lens flare will automatically animate based on the source input channel.
Source: Use an image as the occlusion source.
- After Effects: Select the layer from the Occlusion > Source selector.
- Premiere Pro: Select the track from the Occlusion > Source selector.
- Final Cut Pro X: Click the drop zone to the right of the Occlusion > Source parameter, choose a clip, and press Apply Clip below the Viewer.
- Avid Editing Systems: Place the source clip on a track below the clip you applied Lens Flare to.
- OFX Hosts: Assign the image to be used as the Occlusion > Source.
Note**:**The Source input is only available in OFX hosts that support auxiliary inputs. If auxiliary inputs are not supported, they will not be visible. Consult the host documentation for instructions on how to assign a source input as this will vary by host.
Channel: Determines which channel to use for the occlusion source.
Invert: Inverts the source channels.
Threshold: Controls how much the occlusion source affects the flare.
Flicker
Flickers the lens flare.
- Amount: The amount of flicker.
- Speed: The speed of the flicker.
Edge Flare
Flares the frame as the lens flare enters or exists the frame.
- Amount: Controls the amount of the edge flare.
- Size: Sets the size of the edge flare.
Noise
Adds noise to the lens flare elements. Noise can selectively be added to elements based on whether an element’s Lens Noise parameter is enabled. Alternatively, you can apply noise to all elements using the parameter below.
- All Elements: Applies the noise pattern to all lens flare elements.
- Amount: Sets the amount of the noise.
- Scale: Determines the size of the noise.
- X Offset: Moves the noise horizontally.
- Y Offset: Moves the noise vertically.
- Detail: Sets the detail of the noise.
- Texture: Controls the complexity of the noise.
- Randomize: Randomizes the size and position of the noise.
Controls – Elements
Each flare element uses a subset of the parameters below.
Angle: Sets the angle.
Aspect: Sets the aspect ratio.
Blur: Blurs the element.
Brightness: Controls the brightness.
Brightness Variance: Randomizes the brightness between multiple elements.
Center: Determines the center of the Chroma Ring along the flare.
Center Brightness: Sets the brightness of the stripe’s center.
Center Offset: Pushes all the Disc edges outwards.
Chroma: Changes the saturation of the Chroma Ring.
Color: Sets the color.
Color Variance: Randomizes the color between multiple elements.
Cycles: Determines the number of Chroma Bands.
Density: Sets the amount of rays.
Edge Fade: Fades the element as it moves towards the edge of the screen.
Element Count: Sets the number of elements.
Hotspot: Sets the size of the Star’s center hotspot.
Inside Width: Changes the size of the inner ramp.
Jitter: Randomizes the angle.
Length: Sets the length of the stripe.
Lens Noise: Determines whether the Lens Noise controls affect the enabled element.
Lock To X Axis: Locks the element to the X axis so it will only move vertically.
Lock To Y Axis: Locks the element to the Y axis so it will only move horizontally.
Match Flare Angle: Matches the Circle and Polygon element’s angle to the flare angle. This is especially useful when the Aspect parameter has been adjusted.
Middle Width: Adjusts the size of the middle ramp.
Noise: Controls the amount of noise in an element.
Noise Density: The strength of the noise.
Offset: For most elements, Offset determines the element’s inner diameter. For Circles and Polygons, it shifts the shapes along the flare axis.
Outside Width: Sets the size of the outer ramp.
Position: Sets the position of the element along the flare.
Position Variance: Randomizes the position between multiple elements along the flare.
Ramp Gamma: Sets the Hot Spot’s black point.
Ramp Scale: Changes the Hot Spot’s size.
Randomize: Randomizes size and position.
Ring Brightness: Sets the brightness of the Hot Spot’s ring.
Ring Size: Changes the size of the Hot Spot’s ring.
Ring Softness: Softens the Hot Spot’s ring.
Scale: Sets the size.
Sides: Determines the number of sides.
Size Variance: Randomizes the size between multiple elements.
Softness: Blurs the element.
Softness Variance: Randomizes the softness between multiple elements.
Spread: Determines the distribution of an element.
Taper: Tapers the Chroma Band’s edges.
Total Scale: Sets the size of all elements.
Vertical Variance: Randomizes the vertical position between multiple elements.
Weight: polygons and Circles can be weighted to either the beginning or end of the lens flare.
Warp: Enables the warping of the Ellipse and Ring elements as they exit the frame.
Width: Adjusts the width.
X-Offset: Offsets the element horizontally.
Y-Offset: Offsets the element vertically.
Working with The Filter
- Apply BCC+ Lens Flare from the BCC Lights unit category.
- Click the BCC FX Editor button from the Effects and Presets banner. The FX Editor user interface opens and consists of Presets, Parameters and Viewer windows.
- Try out some of the presets.
- In the Presets window, choose a new preset group from the pop-up menu to see a different set of lens flare presets.
- Click and drag the hot spot point control to move the origin of the lens flare. This is the Position control.
- Click and drag the center point control to change the end position of the lens flare. This is the Pivot control.
- Adjust the Color, Brightness, Scale and Angle as desired.If the lens flare is positioned towards the edge of the frame, you can use the Edge Flare controls to simulate the flaring of the light source as the flare enters or exists the frame.
- Change the Edge Flare > Amount and Size and then move the lens flare towards the edge of the screen to see the effect.
- Noise can be added to all elements by enabling Noise > All Elements and then setting the noise controls.
Note:To selectively add noise to a single element, you would enable the Lens Noise parameter within the Flare Editor for the desired element. See the next tutorial.
To edit lens flare elements, open the Flare Editor.
- Click the Edit Flare button.The Flare Editor interface opens consisting of a Viewer, Parameters, Global, Flare (currently used flare elements) and Elements (all available elements).Note:The controls shown in the Global tab affect all elements. These are the same as those shown in the DFT interface prior to opening the Flare Editor.
- Click on an element in the Flare window to select it.The controls for the selected element are displayed in the Parameters tab.
- Adjust the parameters to taste.When multiple elements are selected, the controls for all selected elements are displayed and grouped in the Parameters window.
- Add additional elements by either…
- Double-click an element in the Elements window and it is added to the end of the stack in the Flare window. If an element is selected in the Flare window prior to the double-click, the new element is added after the selection.or
- Drag and drop from the Elements window to the Flare window or Viewer. Multiple selected elements can be dragged and dropped simultaneously.
- To move an element to a new position in the stack, drag the element’s icon to a new position. Multiple elements can be moved at once.
- To rename an element, click in the element’s text box and type to rename it.
- To delete an element, select it and press the Delete key.
- To delete all elements and start from scratch, press the Reset icon at the top left of the Viewer.
- Click the Done icon to exit the Flare Editor.
- Click the Apply button to return to the host application.
The values of the parameter adjustments in the FX Editor user interface are transferred to your host application.