BCC Light Zoom

BCC Obsolete

LightZoomAft

Deprecated – replaced by BCC Rays Puffy

We recommend use of BCC Rays Puffy or other similar filters in the BCC Rays * family instead of the older BCC Light Zoom.  The newer filters in the BCC Rays * family such as BCC Rays Puffy offer a more sophisticated set of looks and controls as well as faster render speeds.

Overview

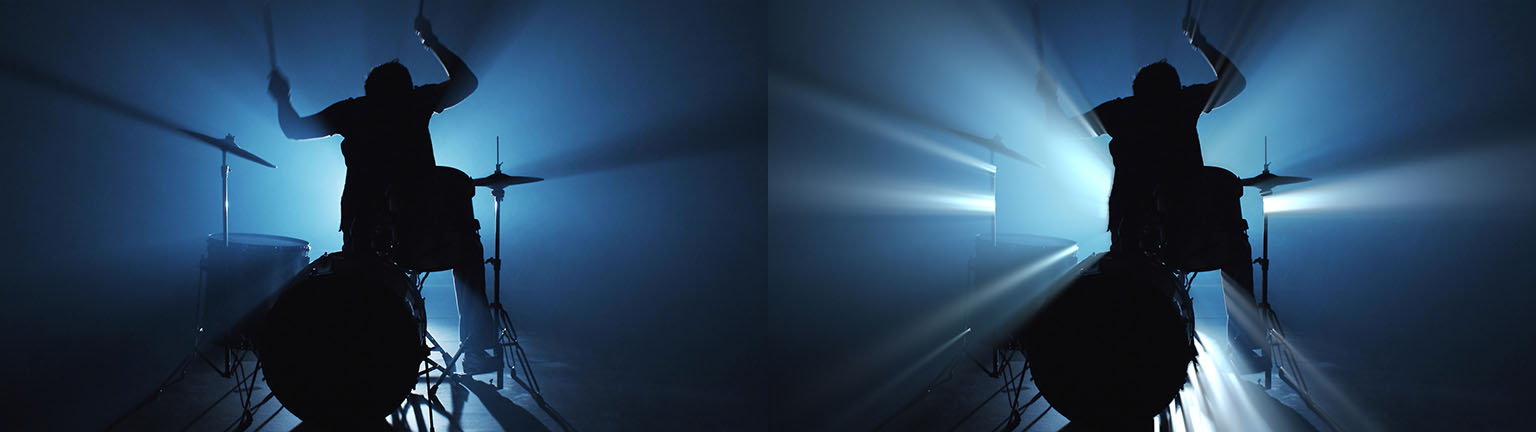
The Light Zoom filter creates rays of light that spread out from the light source point in all directions. As the rays expand, their intensities are affected by the luminosities of the pixels that they cross. The farther from the source the ray extends, the less it is affected by the intensities of new pixels that it crosses. This process is referred to as attenuation, since the affect of the pixels on the intensity of the rays attenuates, or lessens, over time.

Function

Presets and Common Controls

BCC filters come with a library of factory installed presets plus the ability to create your own custom presets and preview them with the BCC FX Browser™.

BCC filters also include common controls that configure global effect preferences and other host-specific effect settings.

For more information about working with presets and other common controls, Click Here.


The Light Source X and Y position points set the location of the simulated light source on the X and Y axis.

Intensity adjusts the intensity of the light source.

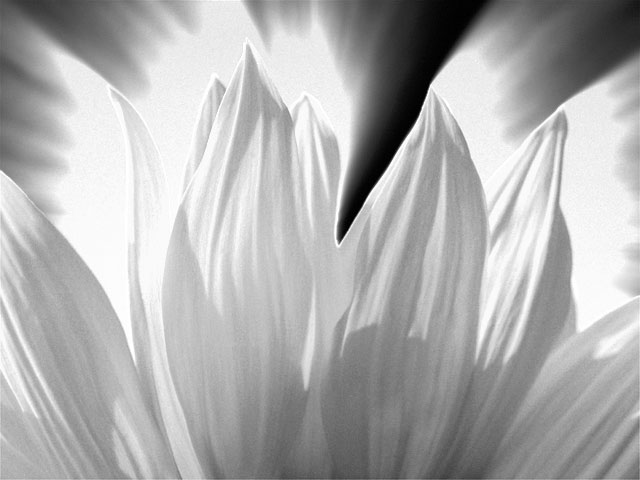
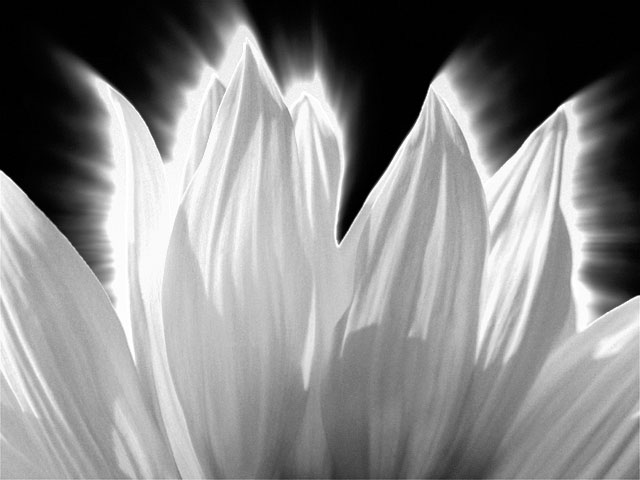
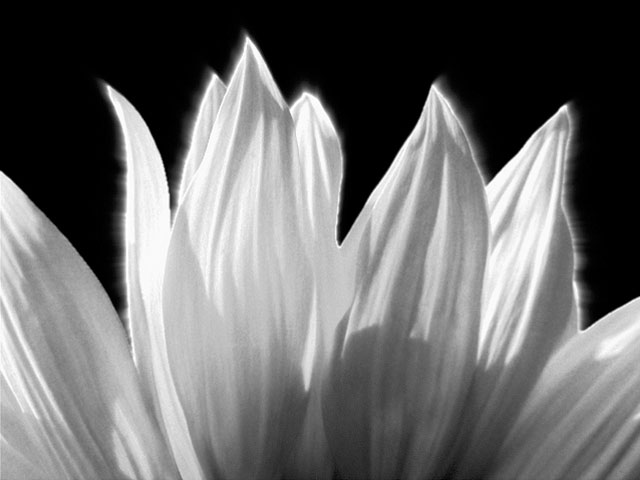
The Attenuation menu chooses the type of mathematical process used to determine how the influence of pixels affecting the intensity of the rays of light changes over time. The choices are Exp Distance SQ, Exp Distance, Expon Dist Sqrt, Dist SQ, Distance, and Dist Sqrt. Experiment with the various modes to see which works best with your effect.

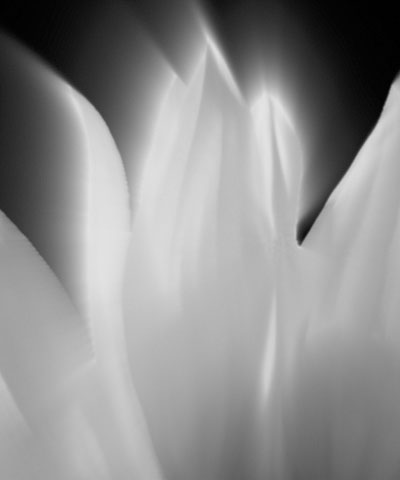
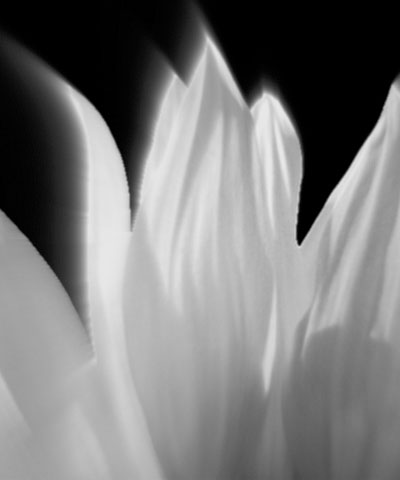
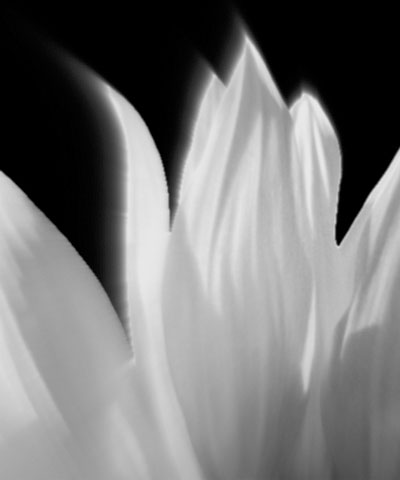
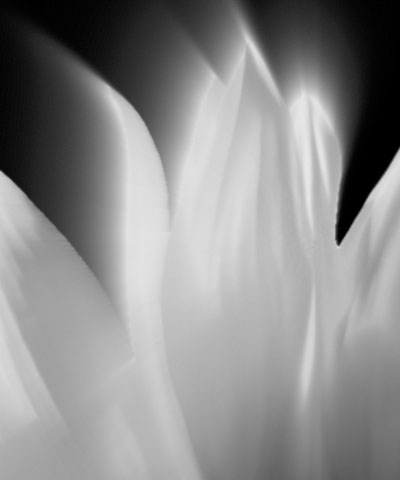
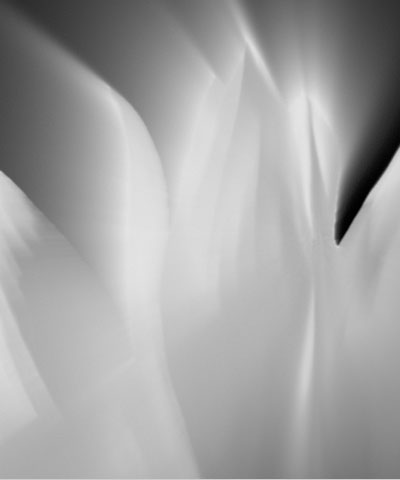
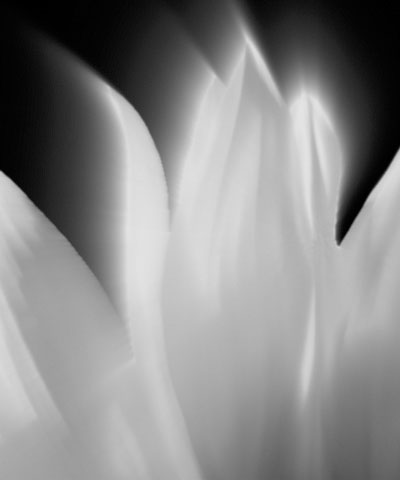
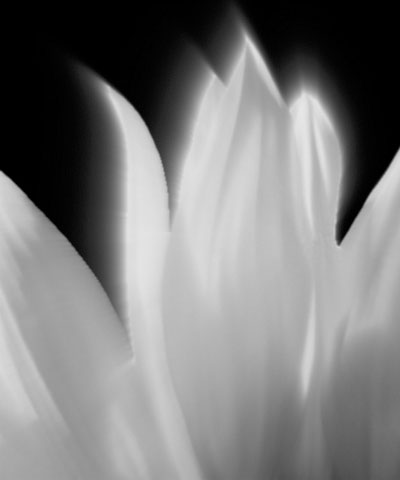
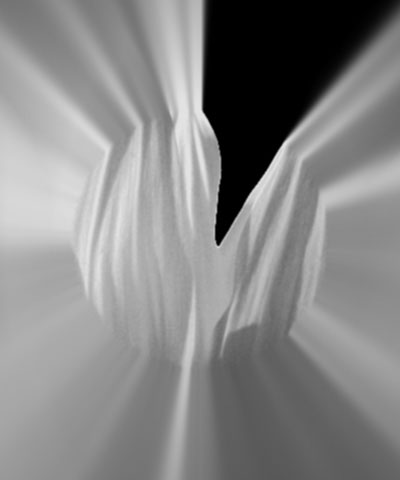
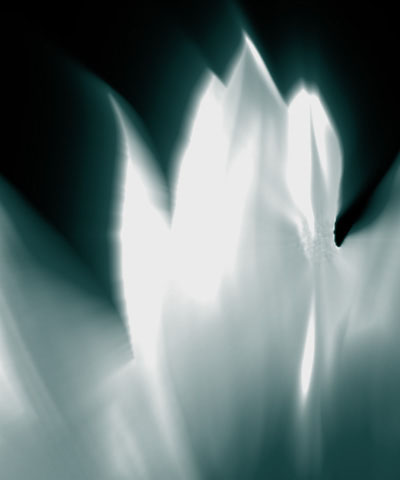
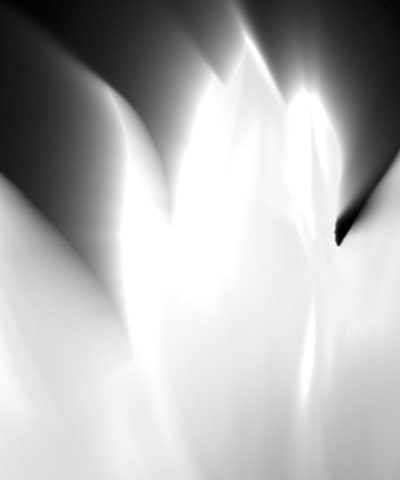
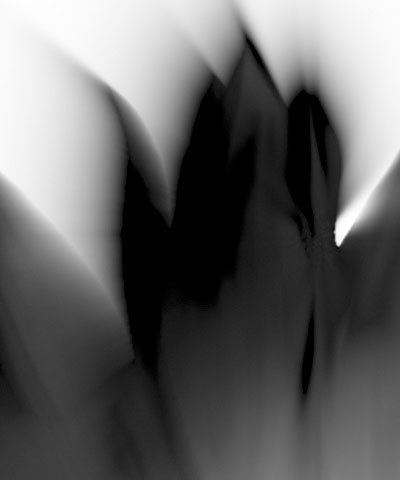
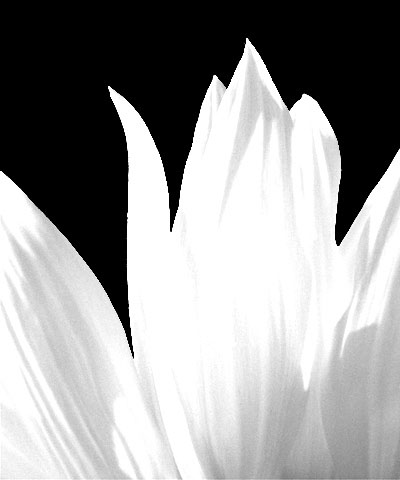
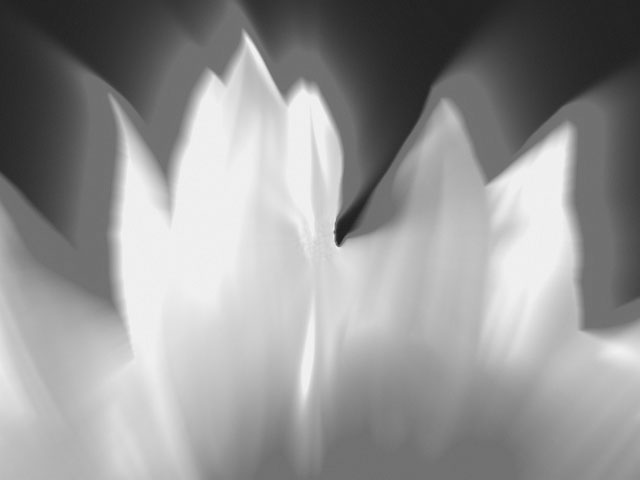
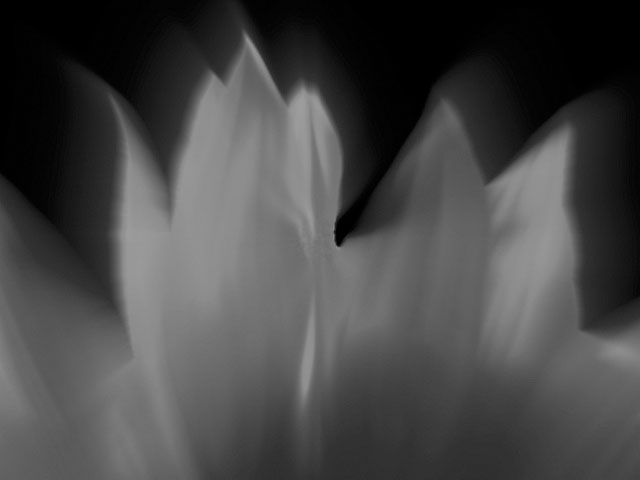
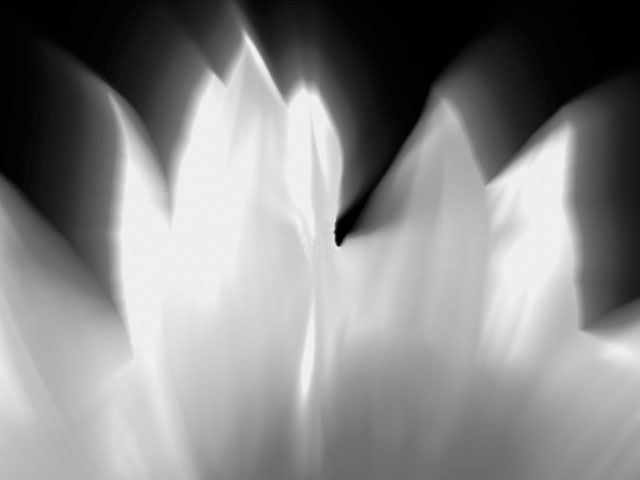
The following illustrations below show the affect of various Attenuation Types on the matte created by the filter.
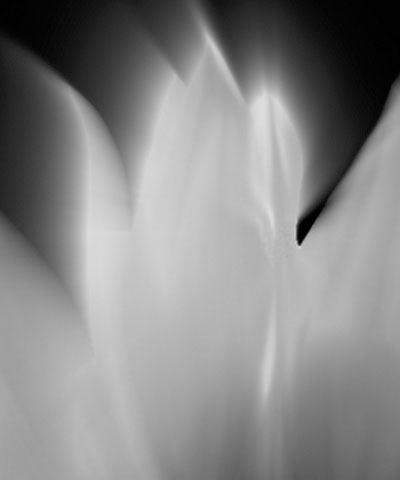
lightmatte.attentype.expSQ lightmatte.attentype.expdis lightmatte.attentype.distSQ
Expon Distance SQ Expon Distance Distance SQ

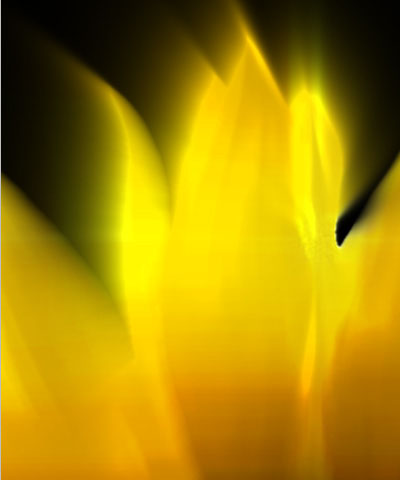
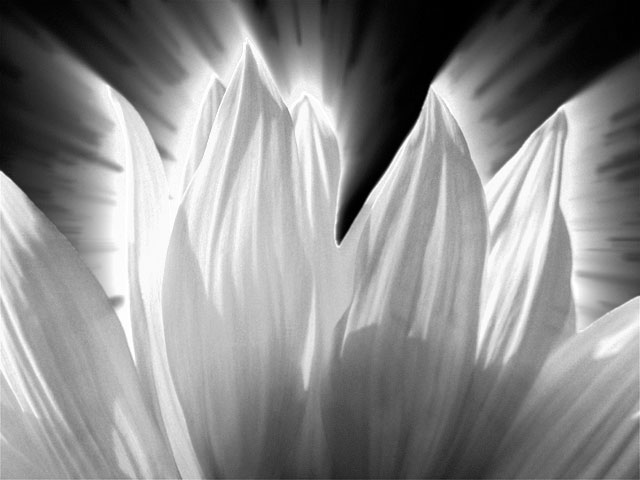
Ray****Length adjusts the length of the rays of light that emanate from the source. The length of the rays is also affected by the attenuation.

lightmatte.raylength.35 lightmatte.raylength.50 lightmatte.raylength.100
Ray Length=35 Ray Length=50 Ray Length=100

Minimum Influence determines the minimum amount of influence the pixels have on the length of the rays. Increasing this value is similar to decreasing the Ray Length value.

lightmatte.minimuminf.10 lightmatte.minimuminf.30 lightmatte.minimuminf.60
Minimum Influence=10 Minimum Influence=30 Minimum Influence=60

Aspect adjusts the shape of the light rays and the resulting matte. Positive values stretch the rays and matte horizontally, and negative values stretch them vertically.


Advanced Parameter Group

The Attenuation****Bias menu determines how difference between the intensity of the pixels being passed and the intensity of the rays affects the attenuation.

  • If Off is chosen, the difference in intensity between an individual pixel and the ray crossing it does not affect the amount of influence the pixel has on the ray’s intensity.
  • One Way uses the Bias Amount value to determine how the influence of a pixel is affected by its intensity. Increasing positive values cause pixels that are more intense than the rays to have increasing influence on the intensity of the rays. This lightens to output. Decreasing negative cause pixels that are less intense that the rays to have increasing influence on the intensity of the rays. This darkens the output.
  • Two Way is similar to One Way, but causes a more pronounced effect. For example, if the Bias Amount value is positive, Two Way increases the influence of pixels that are more intense than the rays while simultaneously decreasing the influence of pixels that are less intense than the rays.
  • Contrast affects pixels that are closer to black or white over pixels that are closer to gray.

Increasing positive HV Bias values cause the rays to travel predominantly on horizontal and vertical lines. Decreasing negative values cause the rays to conform more to lines that form a 45 degree angle with the horizontal axis.

Ray Holdout Radius determines where the rays of light or the attenuation starts in relation to the light source. Positive values create a circular region centered around the light source beyond which the rays emanate. Attenuation does not begin until after the radius is reached. Decreasing negative values cause the attenuation to start closer to the light source point.

lightmatte.radius.n10 lightmatte.radius.10 lightmatte.radius.20
Ray Holdout Radius= -10 Ray Holdout Radius Ray Holdout Radius=20

Directional****Tuning smooths the angular behavior of the light. For most purposes, you should leave this control at the default value.

The Color menu determines how the applied light affects the source image. You can also use this menu to preview the source channel used by the filter to create the effect.

  • Colorize uses the applied light to tone the image using controls similar to those in the Colorize filter.
  • Image produces a colored lighting effect using color information from the chosen Image Layer.
  • Light Matte uses the applied light to modify or create an alpha channel and displays a grayscale matte.
  • Inverse Light Matte works similarly to Light Matte, but inverts the result.
  • Alpha uses the applied light to modify or create an alpha channel and uses it to composite the source image.
  • View Source displays the chosen Light From channel. This can be especially useful if you are using edges in the image as the Light From channel. In the following examples, Light From is set to Luma. See the following section for more information on the Light From menu.
lightzoom.mode.colorize lightzoom.mode.sourcecolor lightzoom.mode.lightmatte
Colorize Image Light Matte


lightzoom.mode.invmatte lightzoom.mode.alpha lightzoom.mode.viewsource
Inverse Light Matte Alpha View Source

The Color Source Layer menu sets the layer used when the Color menu is set to Image.

Source Threshold subtracts the threshold from each pixel when computing the light.

Light Threshold sets a value that is subtracted from the light at each pixel before it is applied. If you are animating the position of an object, increasing Light Threshold will cause the light to fade out more rapidly as you move away from the source image.

The Light From menu determines which source color channel is used to create the light and to calculate the intensities of the source pixels. Pixels with higher values in the selected channel are considered to have higher intensities.

  • Luma, Red, Green, and Blue use the corresponding color channel and multiply it by the source alpha channel.
  • Luma Inverse uses the inverted luma channel to make the light.
  • Unmultiplied Luma and Alpha use the unmodified corresponding source channels.
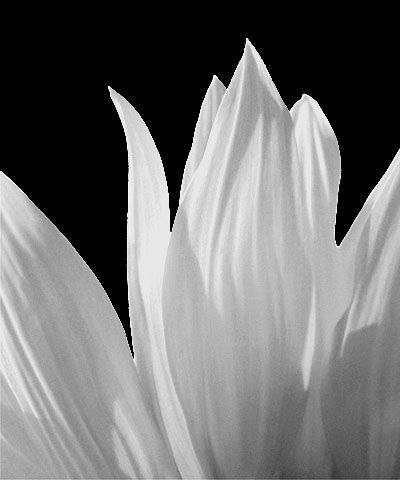
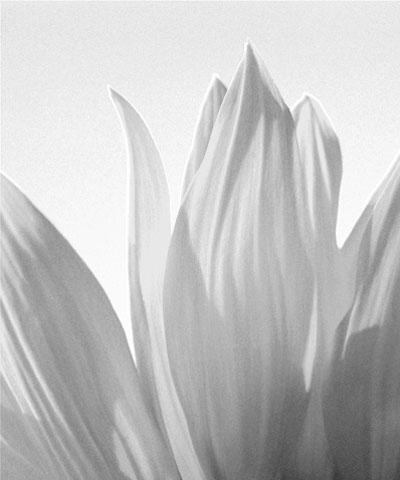
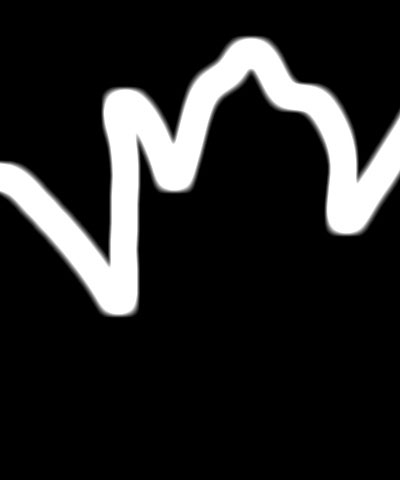
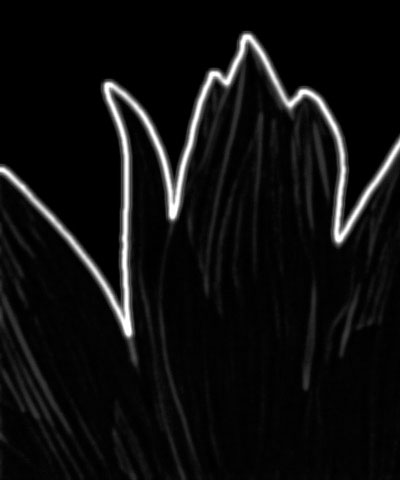
  • Luma Cartoon Edges and Alpha Cartoon Edges find edges in the corresponding source channel, apply outlines to the edges, and use the resulting image. When Luma Cartoon Edges or Alpha Cartoon Edges is selected, Thickness/Intensity adjusts the width of the outlined edges, and Cartoon Threshold sets the value in the threshold above which pixels are considered fully on.
  • Luma Edges and Alpha Edges find edges in the corresponding source channel and use the resulting image. When Luma Edges or Alpha Edges is selected, Thickness/Intensity adjusts the intensity of the edges, and Edge Floor adjusts the sensitivity of the filter when searching for edges in the source. Lower values increase sensitivity.

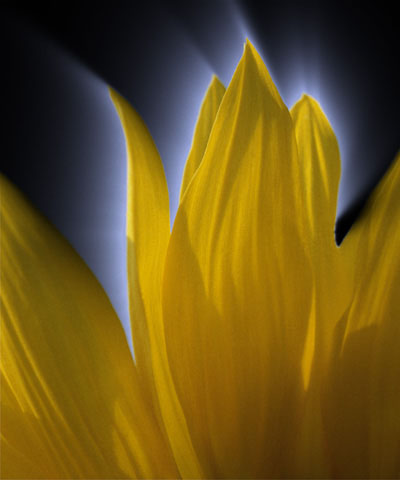
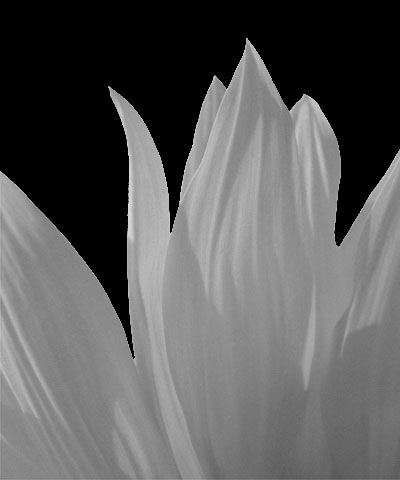
The illustrations below were created with the Color menu set to Image, so only the source channel used by the filter, and not the output, is visible. See “Advanced Parameter Group” for more information on the Color menu.

lightmatte.channel.luma lightmatte.channel.unmult lightmatte.channel.alpha
Luma Unmultiplied Luma Luma Alpha


lightmatte.channel.acartoon lightmatte.channel.lumaedge lightmatte.channel.red
Alpha Cartoon Edges Luma Edges Red


Edges Parameter Group

When Luma Edges or Alpha Edges is selected in the Light From Channel menu, Thickness/Intensity adjusts the intensity of the edges.

Edge Pre Blur blurs the source image before the filter searches for edges. This blur does not appear in the output; it is used only in edge detection. This parameter only works if the Light From Channel menu is set to Luma Edges, Alpha Edges, Luma Cartoon Edges, or Alpha Cartoon Edges.

Edge Post Blur blurs the edges before they are used to create the applied light.This parameter only works if the Light From Channel menu is set to Luma Edges, Alpha Edges, Luma Cartoon Edges, or Alpha Cartoon Edges.

Cartoon Threshold sets the value in the threshold above which pixels are considered fully on. This parameter is only available if the Light From Channel menu is set to Luma Cartoon Edges or Alpha Cartoon Edges.

The Color Preset menu allows you to choose a Colorize preset (a gradient of up to six colors to tone the light). If the Mode menu is not set to Colorize, the presets have no affect.


Gradient

The BCC Gradient group enables complex, multi-color gradients for use in a variety of effect settings such as colorizing light sources.

For more information on the BCC Gradient tool, Click Here.


The Apply Mode menu controls how the filter is composited over the source image.  For information on the available apply modes, Click Here.


Composite Parameter Group

These controls determine how the applied light is composited over the underlying image. When the Opaque Light checkbox is selected, the light created by the effect is opaque. Deselect this option to create light with a range of transparency.

lightzoom.opaquelight.off lightzoom.opaquelight.on
Opaque Light=off Opaque Light=on

Light****Opacity controls the opacity of the light as it is composited over the source image.

lightzoom.lightopacity.50 lightzoom.lightopacity.150
Light Opacity=50 Light Opacity=150

Apply Mix controls the mix of the chosen Apply Mode with the Normal apply mode. If the Apply Mode is Normal, Apply Mix has no affect. If Apply Mix is 0, Apply Mode has no affect. Increase Apply Mix to blend the Apply Mode setting with the Normal apply mode.

The Noise menu determines which aspect of the effect is affected by the noise.

  • When Off is chosen, the noise does not affect the output, and the remaining parameters in this section have no affect.

  • Source Light causes the noise to affect the intensity of the source in the chosen Light From channel. See page 34 for more information on the Light From menu.

  • Attenuation causes the noise to affect the amount of attenuation the light rays experience as the emanate from the source and interact with the pixels they cross.

  • Light causes the noise to affect the light output by the filter. This choice often creates somewhat grainy images.

  • View Noise displays a grayscale preview of the noise. The illustrations throughout this section were created with Noise Target set to View Noise.

  • Note: Setting Noise to Attenuation has a similar effect to that of Stringiness in the Light Rays filters.


Noise Parameter Group

Noise Density sets the percentage of pixels that are affected by the noise.

Noise Intensity adjusts the intensity of the noise. Negative values cause the noise to have the opposite effect on the selected Noise Target as positive values.

lightmatte.noiseint.50 lightmatte.noiseint.100
Noise Intensity=50 Noise Intensity=100

Noise****Blur applies a blur to the noise, creating a smoother, more organic, effect.

Noise Blur Quality sets the quality of the Noise Blur. Pyramid is the fastest option and is generally adequate unless Noise Target is Light. It produces a blur similar in quality to the Pyramid Blur filter. Pyramid Smoother produces a better quality pyramid blur and increases rendering times slightly. The remaining choices*, Gaussian Low, Gaussian Medium, Gaussian High, Gaussian Higher*, and Gaussian Highest produce gaussian blurs of increasing quality. These options increase rendering times proportionately.

When the Bidirectional Noise checkbox is selected, the noise affects the target both positively and negatively. For example, in the Noise menu is set to Attenuation and Bidirectional Noise is selected, the attenuation both increases in some regions and decreases in others. If Bidirectional Noise is not selected, the attenuation increases in some areas, and never decreases by the noise.

lightmatte.noise.bidir.off lightmatte.noise.bidir.on
Bidirectional Noise=off Bidirectional Noise=on

Seed determines which value is input to the random number generator used by the filter to create noise. Adjust this value when you like the overall effect but want to adjust the random configuration of the noise pattern.

  • Note: Animating Seed creates noise that varies from frame to frame, because the noise affects a different randomly chosen group of pixels in each consecutive frame. A constant value creates static noise that retains its appearance from frame to frame.

The Auto Animate checkbox causes the filter to use a different random number seed for each frame. This is best used with small amounts of noise because it can produce results that are chaotic.

Perturbation and Perturbation Seed add a small amount of randomness to the numbers produced by Seed, allowing you to create noise patterns that differ between frames by a controlled amount. The best way to do this is to animate Perturbation Seed by at least one unit from one frame to the next, unless you want the noise pattern the same for some consecutive frames. Then adjust Perturbation until you get the desired amount of change.


Radial Matte Parameter Group:

If the Radial Matte On checkbox is not selected, the parameters in this section have no affect. The Inside Radius and Outside Radius position point controls set the range of the matte, and the Inside Blend and Outside Blend soften the matte.To create a wipe using this filter, animate Outside Radius from a negative value to a value that displays the entire image.

When theRadial Matte On checkbox is selected, the Light Zoom filter creates a matte over the light. Deselecting the Radial Matte On checkbox turns the matte off.


Motion Tracker

The BCC Motion Tracker allows you to track the motion of an object, then use the motion path to drive other geometric properties of the effect without the need for keyframing.

For more information on the Motion Tracker, Click Here.


PixelChooser

The BCC PixelChooser provides simple, built-in masking of the effect result.  The PixelChooser is generally used to select a portion of the image and restrict an effect to just the selected area while maintaining the original image content in unselected regions.  The selection can be based on geometric shapes or on the image’s luma/color properties.

For more information on the PixelChooser, Click Here.

The PixelChooser Target menu sets which parameters are affected by the PixelChooser.

  • Choosing Light scales down the light level at each point in the effect.
  • Mix makes the PixelChooser behave in the same way that it does in most filters – it mixes the original image with the filtered image.
  • Source Light uses the pixel chooser to mask the image as the light is created. It does not affect the compositing of the light over the image.
  • Attenuation scales down the attenuation at each point where pixels are not fully chosen. This tends to make the rays shorter. You can make the rays stop in an unchosen region and pick up again in the chosen region.
  • Attenuation Boost reverses Attenuation; rays travel further in unchosen regions.
  • Off turns off these options.

Category:

BCC Particles

BCC Color & Tone

BCC Perspective

BCC Perspective

BCC Licensing

BCC Obsolete

BCC Key & Blend

BCC Obsolete

Nested Subgroup

BCC Art Looks

BCC Licensing

BCC Time

Nested Subgroup

BCC Image Restoration

BCC Transitions

BCC Blur & Sharpen

BCC Transitions

BCC Obsolete

BCC Textures

BCC Color & Tone

BCC Image Restoration

BCC Warp

BCC Art Looks

BCC Transitions

BCC Art Looks

BCC Art Looks

BCC Stylize

BCC Textures

BCC Art Looks

BCC Transitions

BCC Key & Blend

BCC Key & Blend

BCC Textures

BCC Textures

BCC Color & Tone

BCC Stylize

BCC Color & Tone

BCC Color & Tone

BCC Obsolete

BCC Color & Tone

BCC Stylize

BCC Transitions

BCC Particles

Uncategorized

Uncategorized

Nested Subgroup

BCC Key & Blend

BCC Key & Blend

BCC Transitions

BCC Match Move

BCC Match Move

BCC Color & Tone

BCC Transitions

BCC Transitions

BCC Transitions

BCC Transitions

BCC Transitions

BCC Perspective

BCC Warp

BCC Transitions

BCC Perspective

BCC Stylize

BCC Transitions

BCC Obsolete

BCC Film Style

BCC Obsolete

BCC Blur & Sharpen

BCC Warp

BCC Stylize

BCC Image Restoration

BCC Image Restoration

BCC Image Restoration

BCC Perspective

BCC Perspective

BCC Key & Blend

BCC Stylize

BCC Lights

Uncategorized

BCC Stylize

BCC 3D Objects

BCC 3D Objects

BCC 3D Objects

BCC Film Style

BCC Transitions

BCC Film Style

BCC Perspective

BCC Blur & Sharpen

BCC Film Style

BCC Obsolete

BCC Obsolete

BCC Film Style

BCC Obsolete

BCC Obsolete

BCC Image Restoration

BCC Transitions

BCC Textures

BCC Browser

BCC Blur & Sharpen

BCC Lights

BCC Lights

BCC Lights

BCC Stylize

BCC Obsolete

Nested Subgroup

BCC Textures

BCC Transitions

BCC Stylize

BCC Art Looks

BCC Color & Tone

BCC Color & Tone

BCC Time

BCC Time

BCC Transitions

BCC Lights

BCC 3D Objects

BCC Stylize

BCC Obsolete

BCC Transitions

BCC Image Restoration

BCC Transitions

BCC Lights

BCC Obsolete

BCC Transitions

BCC Transitions

BCC Transitions

BCC Transitions

BCC Blur & Sharpen

BCC Obsolete

BCC Color & Tone

BCC Lights

BCC Transitions

BCC Obsolete

BCC Lights

BCC Transitions

BCC Key & Blend

BCC Obsolete

BCC Lights

BCC Key & Blend

BCC Key & Blend

BCC Transitions

BCC Time

BCC Image Restoration

BCC Key & Blend

BCC Film Style

BCC Match Move

BCC Key & Blend

BCC Key & Blend

BCC Art Looks

BCC Stylize

BCC Textures

BCC Warp

BCC Stylize

BCC Blur & Sharpen

BCC Image Restoration

Nested Subgroup

Nested Subgroup

Nested Subgroup

Nested Subgroup

Nested Subgroup

Nested Subgroup

Nested Subgroup

Nested Subgroup

Nested Subgroup

BCC Stylize

BCC Transitions

BCC Transitions

BCC Color & Tone

BCC Obsolete

BCC Textures

BCC Image Restoration

BCC Time

BCC Image Restoration

BCC Particles

Uncategorized

Uncategorized

Uncategorized

Uncategorized

BCC Perspective

BCC Perspective

BCC Particles

BCC Particles

BCC Particles

BCC Transitions

BCC Particles

BCC Art Looks

BCC Particles

Nested Subgroup

Nested Subgroup

BCC Image Restoration

Nested Subgroup

BCC Warp

BCC Art Looks

BCC Time

BCC Key & Blend

BCC Key & Blend

BCC Stylize

BCC Transitions

BCC Blur & Sharpen

BCC Blur & Sharpen

BCC Transitions

BCC Particles

BCC Lights

BCC Transitions

BCC Lights

BCC Lights

BCC Lights

BCC Lights

BCC Lights

BCC Lights

BCC Lights

BCC Lights

BCC Transitions

BCC Stylize

BCC Image Restoration

BCC Image Restoration

BCC Textures

BCC Lights

BCC Key & Blend

BCC Transitions

BCC Transitions

BCC Stylize

BCC Stylize

BCC Transitions

BCC Transitions

BCC Warp

BCC Transitions

BCC Textures

BCC Obsolete

BCC Color & Tone

BCC Stylize

BCC Stylize

BCC Obsolete

BCC Image Restoration

BCC Particles

BCC Particles

BCC Perspective

BCC Transitions

BCC Key & Blend

BCC Transitions

BCC Blur & Sharpen

BCC Lights

BCC Art Looks

BCC Lights

BCC Obsolete

BCC Textures

BCC Textures

BCC Obsolete

BCC Transitions

BCC Time

BCC Transitions

BCC Art Looks

BCC Transitions

BCC Time

BCC 3D Objects

BCC Time

BCC Time

BCC Color & Tone

BCC Transitions

BCC Warp

BCC Warp

BCC Transitions

BCC Film Style

BCC Key & Blend

BCC 3D Objects

BCC Blur & Sharpen

BCC Image Restoration

Uncategorized

BCC Transitions

BCC Warp

BCC Textures

BCC Time

BCC Stylize

BCC Warp

BCC Color & Tone

BCC Film Style

BCC Transitions

BCC VR

BCC VR

BCC VR

BCC VR

BCC VR

BCC Warp

BCC Art Looks

BCC Transitions

BCC Warp

BCC Textures

BCC Particles

BCC Image Restoration

BCC Match Move

BCC Textures

BCC Textures

BCC Obsolete

BCC Obsolete

BCC Obsolete

BCC Blur & Sharpen

BCC Image Restoration

BCC Blur & Sharpen

BCC Transitions

BCC Blur & Sharpen

BCC Transitions

BCC Blur & Sharpen

BCC Key & Blend

BCC Transitions

BCC Transitions

BCC Blur & Sharpen

BCC Transitions

BCC Transitions

BCC Color & Tone

BCC Film Style

BCC Transitions

BCC Film Style

BCC Film Style

BCC Color & Tone

BCC Color & Tone

BCC Lights

BCC Transitions

BCC Image Restoration

BCC Transitions

BCC Stylize

BCC Transitions

BCC Transitions

BCC Blur & Sharpen

BCC Transitions

BCC Blur & Sharpen

BCC Transitions

BCC Film Style

BCC Stylize

BCC Lens

BCC Lights

BCC Color & Tone

BCC Film Style

BCC Art Looks

BCC Lens

BCC Optical Diffusion

BCC Lights

BCC Lens

BCC Grads and Tints

BCC Art Looks

BCC Key & Blend

BCC Art Looks

BCC Grads and Tints

BCC Grads and Tints

BCC Film Style

BCC Film Style

BCC Image Restoration

BCC Image Restoration

BCC Color & Tone

BCC Lens

BCC Optical Diffusion

BCC Blur & Sharpen

BCC Color & Tone

BCC Optical Diffusion

BCC Optical Diffusion

BCC Grads and Tints

BCC Key & Blend

BCC Color & Tone

BCC Lights

BCC Film Style

BCC Optical Diffusion

BCC Optical Diffusion

BCC Grads and Tints

BCC Lights

BCC Lights

BCC Lights

BCC Color & Tone

BCC Optical Diffusion

BCC Art Looks

BCC Color & Tone

BCC Key & Blend

BCC Lights

BCC Art Looks

BCC Color & Tone

BCC Lights

BCC Lens

BCC Lights

BCC Lights

BCC Film Style

BCC Color & Tone

BCC Key & Blend

BCC Optical Diffusion

BCC Grads and Tints

BCC Optical Diffusion

BCC Art Looks

BCC Key & Blend

BCC Key & Blend

BCC Lights

BCC Grads and Tints

BCC Color & Tone

BCC Optical Diffusion

BCC Lens

BCC Grads and Tints

BCC Lights

BCC Lights

BCC Lights

BCC Color & Tone

BCC Grads and Tints

BCC Color & Tone

BCC Optical Diffusion

BCC Grads and Tints

BCC Optical Diffusion

BCC Grads and Tints

BCC Lights

BCC Grads and Tints

BCC Textures

BCC Film Style

BCC Grads and Tints

BCC Perspective

BCC Transitions

BCC Lens

BCC Art Looks

Title Studio

Title Studio

Title Studio

Title Studio

Title Studio

Title Studio

Title Studio

BCC 3D Objects

Tutorial

Tutorial

Tutorial

Tutorial

Tutorial

Tutorial

Tutorial

Tutorial

Tutorial

Tutorial

Tutorial

Title Studio

Title Studio

Title Studio

Title Studio

Title Studio

Title Studio

Title Studio

Title Studio

Title Studio

Title Studio

Title Studio

Title Studio

Tutorial

Title Studio

Title Studio

Title Studio

Title Studio

Title Studio

Title Studio

Title Studio

Title Studio

Title Studio

Tutorial

Effect:
BCC 2D Particles
BCC 3 Way Color Grade
BCC 3D Extruded Image Shatter
BCC 3D Image Shatter
BCC AE Licensing
BCC Alpha Pixel Noise
BCC Alpha Process
BCC Alpha Spotlight
BCC Apply Modes
BCC Artists Poster
BCC AVX Licensing
BCC Beat Reactor
BCC Beat Reactor Integrated
BCC Beauty Studio
BCC Blobs Wipe
BCC Blur
BCC Blur Dissolve
BCC Boost Blend
BCC Brick
BCC Brightness-Contrast
BCC Broadcast Safe
BCC Bulge
BCC Bump Map
BCC Burnt Film
BCC Cartoon Look
BCC Cartooner
BCC Cast Shadow
BCC Caustics
BCC Charcoal Sketch
BCC Checker Wipe
BCC Chroma Key
BCC Chroma Key Studio
BCC Cloth
BCC Clouds
BCC Color Balance
BCC Color Choker
BCC Color Correction
BCC Color Match
BCC Color Palette
BCC Colorize
BCC Colorize Glow
BCC Colorize Glow Dissolve
BCC Comet
BCC Common Controls
BCC Common Controls - Avid
BCC Compare Mode
BCC Composite
BCC Composite Choker
BCC Composite Dissolve
BCC Corner Pin
BCC Corner Pin Studio
BCC Correct Selected Color
BCC Crash Zoom Dissolve
BCC Criss-Cross Wipe
BCC Cross Glitch
BCC Cross Melt
BCC Cross Zoom
BCC Cube
BCC Curl
BCC Curl Dissolve
BCC Cylinder
BCC Damaged TV
BCC Damaged TV Dissolve
BCC DeGrain
BCC Deinterlace
BCC DeNoise
BCC Directional Blur
BCC Displacement Map
BCC Drop Shadow
BCC Dropout Fixer
BCC Dust and Scratches
BCC Dv Fixer
BCC DVE
BCC DVE Basic
BCC Edge Cleaner
BCC Edge Grunge
BCC Edge Lighting
BCC Effects List
BCC Emboss
BCC Extruded EPS
BCC Extruded Spline
BCC Extruded Text
BCC FAQ
BCC Fast Film Glow
BCC Fast Film Glow Dissolve
BCC Fast Film Process
BCC Fast Flipper
BCC Fast Lens Blur
BCC Film Damage
BCC Film Glow
BCC Film Glow Dissolve
BCC Film Grain
BCC Film Process
BCC Fire
BCC Flicker Fixer
BCC Flutter Cut
BCC Fractal Noise
BCC FX Browser
BCC Gaussian Blur
BCC Glare
BCC Glint
BCC Glitter
BCC Glow Alpha Edges
BCC Glow Matte
BCC Gradient
BCC Granite
BCC Grid Wipe
BCC Grunge
BCC Halftone
BCC Hue-Sat-Lightness
BCC Invert Solarize
BCC Jitter
BCC Jitter Basic
BCC Kaleida Dissolve
BCC Laser Beam
BCC Layer Deformer
BCC LED
BCC Lens Blur
BCC Lens Blur Dissolve
BCC Lens Correction
BCC Lens Distortion Wipe
BCC Lens Flare 3D
BCC Lens Flare Advanced
BCC Lens Flare Dissolve
BCC Lens Flare Round
BCC Lens Flare Spiked
BCC Lens Flash
BCC Lens Shape
BCC Lens Transition
BCC Levels Gamma
BCC Light Leaks
BCC Light Leaks Dissolve
BCC Light Matte
BCC Light Sweep
BCC Light Wipe
BCC Light Wrap
BCC Light Zoom
BCC Lightning
BCC Linear Color Key
BCC Linear Luma Key
BCC Linear Wipe
BCC Looper
BCC Magic Sharp
BCC Make Alpha Key
BCC Match Grain
BCC Match Move
BCC Matte Choker
BCC Matte Cleanup
BCC Median
BCC Misalignment
BCC Mixed Colors
BCC Morph
BCC Mosaic
BCC Motion Blur
BCC Motion Key
BCC Motion Tracker
BCC Motion Tracker AE
BCC Motion Tracker Avid
BCC Motion Tracker FCP
BCC Motion Tracker Motion
BCC Motion Tracker PRM
BCC Motion Tracker Red
BCC Motion Tracker Resolve
BCC Motion Tracker Vegas
BCC Multi Shadow
BCC Multi Stretch Wipe
BCC Multi Stripe Wipe
BCC MultiTone Mix
BCC Noise Map
BCC Noise Map 2
BCC Noise Reduction
BCC Optical Flow
BCC Optical Stabilizer
BCC Organic Strands
BCC Overview in Adobe
BCC Overview in Avid
BCC Overview in FCP
BCC Overview in Resolve
BCC Page Turn
BCC Pan And Zoom
BCC Particle Array 3D
BCC Particle Emitter 3D
BCC Particle Illusion
BCC Particle Illusion Dissolve
BCC Particle System
BCC Pencil Sketch
BCC Pin Art 3D
BCC Pinning Controls
BCC Pixel Chooser
BCC Pixel Fixer
BCC PixelChooser – Legacy
BCC Polar Displacement
BCC Posterize
BCC Posterize Time
BCC Preferences
BCC Premult
BCC Presets
BCC Primatte Studio
BCC Prism
BCC Prism Dissolve
BCC Pyramid Blur
BCC Radial Blur
BCC Radial Wipe
BCC Rain
BCC Rays Cartoon
BCC Rays Dissolve
BCC Rays Puffy
BCC Rays Radiant Edges
BCC Rays Radiant Spotlight
BCC Rays Ring
BCC Rays Ripply
BCC Rays Streaky
BCC Rays Textured
BCC Rays Wedge
BCC Rectangular Wipe
BCC Reflection
BCC Reframer
BCC Remover
BCC Reptilian
BCC Reverse Spotlight
BCC RGB Blend
BCC RGB Blur Dissolve
BCC RGB Displacement Dissolve
BCC RGB Edges
BCC RGB Pixel Noise
BCC Ribbon Wipe
BCC Rings Wipe
BCC Ripple
BCC Ripple Dissolve
BCC Rock
BCC Rough Glow
BCC Safe Colors
BCC Scanline
BCC Scatterize
BCC Sequencer
BCC Smooth Tone
BCC Snow
BCC Sparks
BCC Sphere
BCC Sphere Transition
BCC Spill Remover
BCC Spin Blur Dissolve
BCC Spiral Blur
BCC Spotlight
BCC Spray Paint Noise
BCC Stage Light
BCC Star Matte
BCC Stars
BCC Steel Plate
BCC Super Blend
BCC Swish Pan
BCC Temporal Blur
BCC Textured Wipe
BCC Tile Mosaic
BCC Tile Wipe
BCC Time Displacement
BCC Title Studio
BCC Trails
BCC Trails Basic
BCC Tritone
BCC Tritone Dissolve
BCC Turbulence
BCC Twirl
BCC Twister
BCC Two Strip Color
BCC Two Way Key
BCC Type On Text
BCC Unsharp Mask
BCC UpRez
BCC User Guide
BCC Vector Blur Dissolve
BCC Vector Displacement
BCC Veined Marble
BCC Velocity Remap
BCC Video Glitch
BCC Video Morph
BCC VideoScope
BCC Vignette
BCC Vignette Wipe
BCC VR Blur
BCC VR Flicker Fixer
BCC VR Insert
BCC VR Reorient
BCC VR Sharpen
BCC Warp
BCC Water Color
BCC Water Waves Dissolve
BCC Wave
BCC Weave
BCC Wild Cards
BCC Wire Remover
BCC WitnessProtection
BCC Wood Grain
BCC Wooden Planks
BCC Z Space I
BCC Z Space II
BCC Z Space III
BCC Z-Blur
BCC+ Beauty Studio
BCC+ Blur
BCC+ Camera Shake Dissolve
BCC+ Channel Blur
BCC+ Channel Blur Dissolve
BCC+ Channel Blur YUV
BCC+ Composite
BCC+ Crash Zoom Dissolve
BCC+ Cross Zoom Dissolve
BCC+ Directional Blur
BCC+ Directional Blur Dissolve
BCC+ Dissolve
BCC+ F-Stop
BCC+ Film Glow
BCC+ Film Glow Dissolve
BCC+ Film Grunge
BCC+ Flashing
BCC+ Fluorescent
BCC+ Haze
BCC+ Light Leaks
BCC+ Light Leaks Dissolve
BCC+ Magic Sharp
BCC+ Multi-Star Dissolve
BCC+ Prism
BCC+ Prism Dissolve
BCC+ Rack Focus Dissolve
BCC+ Radial Blur
BCC+ Rays Dissolve
BCC+ Smear Blur
BCC+ Spin Blur Dissolve
BCC+ Two Strip
BCC+ Video Glitch
BCC+ Vignette
BCC+Ambient Light
BCC+Black and White
BCC+Bleach Bypass
BCC+Borders
BCC+Camera Shake
BCC+Center Spot
BCC+Chroma Bands
BCC+Chromatic Aberration
BCC+Color Gradient
BCC+Color Infrared
BCC+Color Paste
BCC+Color Shadow
BCC+Color Spot
BCC+Colorize Gradient
BCC+Cross Processing
BCC+Day for Night
BCC+DeBand
BCC+DeBlock
BCC+Defog
BCC+DeFringe
BCC+Depth of Field
BCC+Detail
BCC+Develop
BCC+Diffusion
BCC+Double Fog
BCC+Dual Gradient
BCC+Edge Composite
BCC+Enhancing
BCC+Eye Light
BCC+Film Stocks
BCC+Fog
BCC+Frost
BCC+FX-Editor
BCC+Gels
BCC+Glow
BCC+Glow Darks
BCC+Glow Edges
BCC+Grade
BCC+Halo
BCC+Harris Shutter
BCC+High Contrast
BCC+Holdout Composite
BCC+Ice Halos
BCC+Infrared
BCC+Kelvin
BCC+Key Light
BCC+Lens Distortion
BCC+Lens Flare
BCC+Light
BCC+Looks
BCC+Low Contrast
BCC+Math Composite
BCC+Mist
BCC+ND Gradient
BCC+Net
BCC+Night Vision
BCC+Non-Additive Mix
BCC+Optical Dissolve
BCC+Overexpose
BCC+Photographic
BCC+Polarizer
BCC+Rack Focus
BCC+Radial Exposure
BCC+Radial Tint
BCC+Rays
BCC+Reflector
BCC+ReLight
BCC+Selective Saturation
BCC+Sepia
BCC+Shadows/Highlights
BCC+Silk
BCC+Skin Tone
BCC+Split Field
BCC+Split Tone
BCC+Streaks
BCC+Sunset
BCC+Textures
BCC+Three Strip
BCC+Tint
BCC+Transform
BCC+Video Glitch Dissolve
BCC+Wide Angle Lens
BCC+X-Ray
Removed Gradient Parameters
Title Studio - The Title Container Parameter Guide
Title Studio Basics
Title Studio- Animating an Object Using Keyframes
Title Studio- Creating a Credit Roll
Title Studio- Creating a Credit Roll Part Two
Title Studio- Creating A Fade Effect
Title Studio- Creating a Type on Effect with Title Containers
Title Studio- Creating an Animated Lower Third
Title Studio- Image Processors
Title Studio- Image Processors - Blur Shaders
Title Studio- Image Processors - Glow Shaders
Title Studio- Image Processors - Gradient Shaders
Title Studio- Image Processors - Key Shaders
Title Studio- Image Processors - Light Rays
Title Studio- Image Processors - Light Sweep
Title Studio- Image Processors - Scan Lines
Title Studio- Image Processors - Spotlight
Title Studio- Image Processors - Wipe Shaders
Title Studio- Image Processors- Linear Ripple
Title Studio- Keyframe Palette
Title Studio- Scene Container Parameter Guide
Title Studio- The Animation Tab
Title Studio- The Camera Tab
Title Studio- The Composite Tab
Title Studio- The Container Position Tab
Title Studio- The History Palette
Title Studio- The Info Window
Title Studio- The Lights Tab
Title Studio- The Preferences Panel
Title Studio- The Project Settings Window
Title Studio- The Render Tab
Title Studio- The Text Tool
Title Studio- The Tools Window
Title Studio- The User Marks Window
Title Studio- Understanding Track Structure
Title Studio- Working With Deformers
Title Studio- Working With Image Processor Shaders
Title Studio- Working With Spline Media
Title Studio- Working with the Composite Window
Title Studio- Working with the Controls Window
Title Studio- Working with the Timeline Window
Working in Vegas Pro

PRODUCT UPDATES & SPECIAL OFFERS

Join our email newsletter and keep up to date