Title Studio- Animating an Object Using Keyframes

Title Studio

In this tutorial we will use keyframes to animate a single track in 3D space. While this tutorial covers the animation of a flat text track, the steps here can be used to animate Extruded Text, Spline Objects, and Imported 3D Models.

We will examine:

  • Keyframing
  • Basic interpolation settings
  • Managing your project structure.

Creating a new Flat Text object

  1. In the Timeline window, select the Add New Media button and choose Flat Text. You can also create a new text track by going to the menu bar and selecting Track → New Media → Text.

  1. A new scene container is created and a number of tracks appear in the timeline. The default text will appear in the composite window, as well as the text generator window.

NOTE: When using the plugin, a default placeholder text track is automatically created. You can remove this at any time by pressing delete.

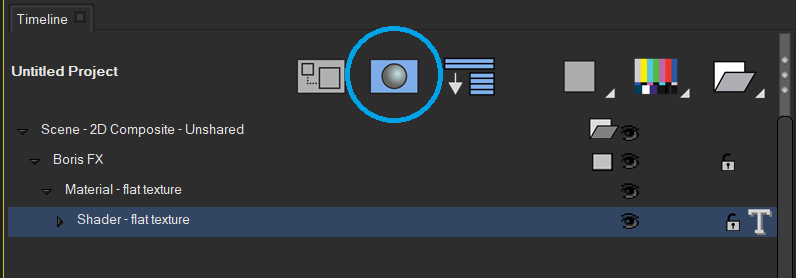
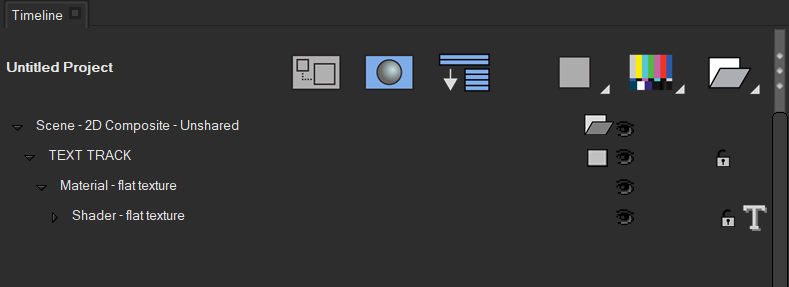
  1. Click the Show/Hide Material Tracks button to toggle additional material tracks that allow you to adjust the texture of the text object. These tracks are hidden by default. 

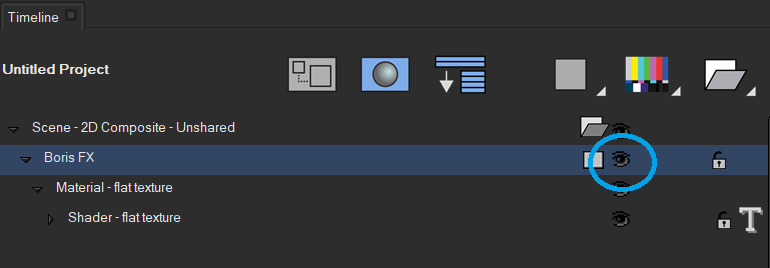
  1. Click the visibility icon on the text track to hide that track. The text disappears from the composite window.

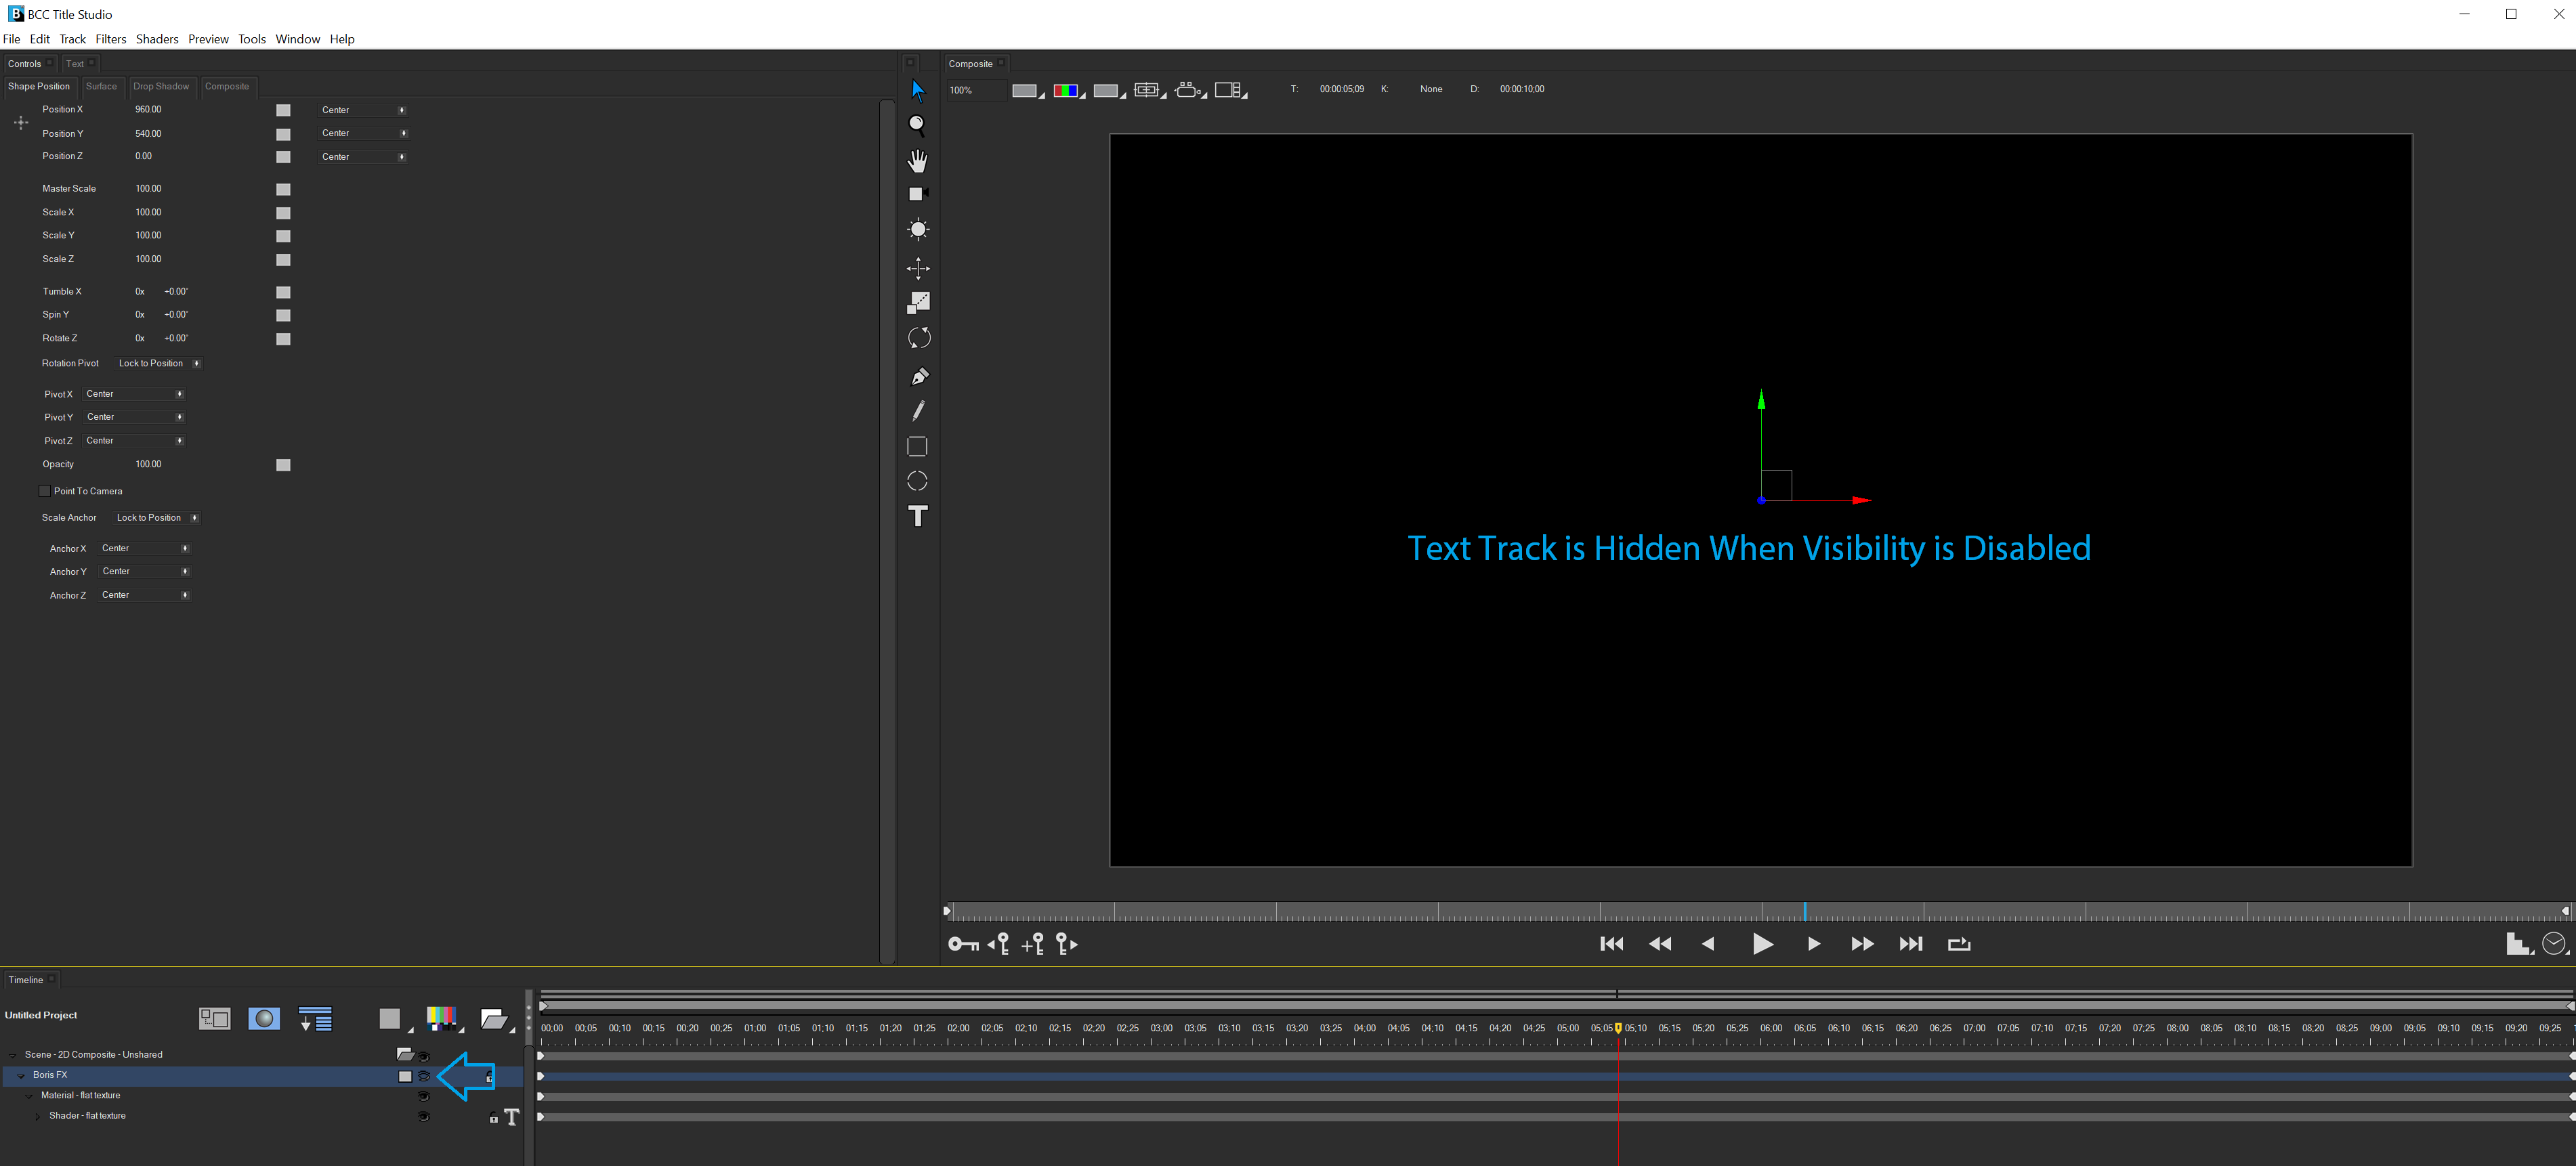
  1. Click the visibility icon again to restore the text’s visibility.

Naming Tracks

But default, trackes are named by their media type. For example, if you change a track’s media to a Still Image File, the track is automatically assigned the file name. However, once you explicitly name a track, the track retains name, even if you change the track’s media type

  1. Select the Text Track and choose Track → Rename track.

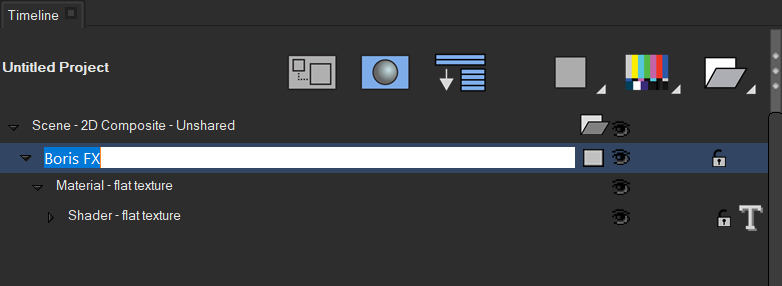
  1. Type “Text Track” and press Enter. The track is renamed “Text Track” You can also rename the track using the following shortcut: Select the track and press Enter. Type “Text Track” and press Enter again. Additionally, you can right click on the track and select Rename Track.

Animating the Text Track

Selecting a track displays the parameters for that type of track in the controls window. Parameters are animated using keyframes. A keyframe sets specific parameter values for a track at a certain point in the timeline. When you place multiple keyframes on the timeline, the program interpolates, or computes intermediate values, between keyframe values. Title Studio includes two types of keyframes, master keyframes and parameter keyframes.

Master keyframes appear on the Shape and Container tracks. Parameter keyframes appear on the Transformations tracks nested inside the Shape and Container tracks. You can associate multiple parameter keyframes with each master keyframe. When you create a parameter keyframe, the corresponding master keyframe is automatically created. In this section, you will set keyframes in the timeline to animate several parameters.


  1. Click to select the Text track. The track already has keyframes placed at the start and end. Because both keyframes contain the default parameter values for the track, the effect is static (not animated).

  2. Move the Current Time Indicator (CTI) to frame 20 (Time 00:00:00:20). The CTI determines which frame of the effect displays in the composite window. As you move the CTI around the timeline, the composite window updates to display the frame at the new CTI location. Because our text is a still image, all the frames are the same. To create an animation you can either drag the CTI to the new location or type the timecode of the new location in the time field in the Timeline window and press Enter. Always make sure that the first keyframe is not selected after you drag the CTI. Selected keyframes are highlighted in red. To deselect a keyframe, click in the track on the right side of the timeline.

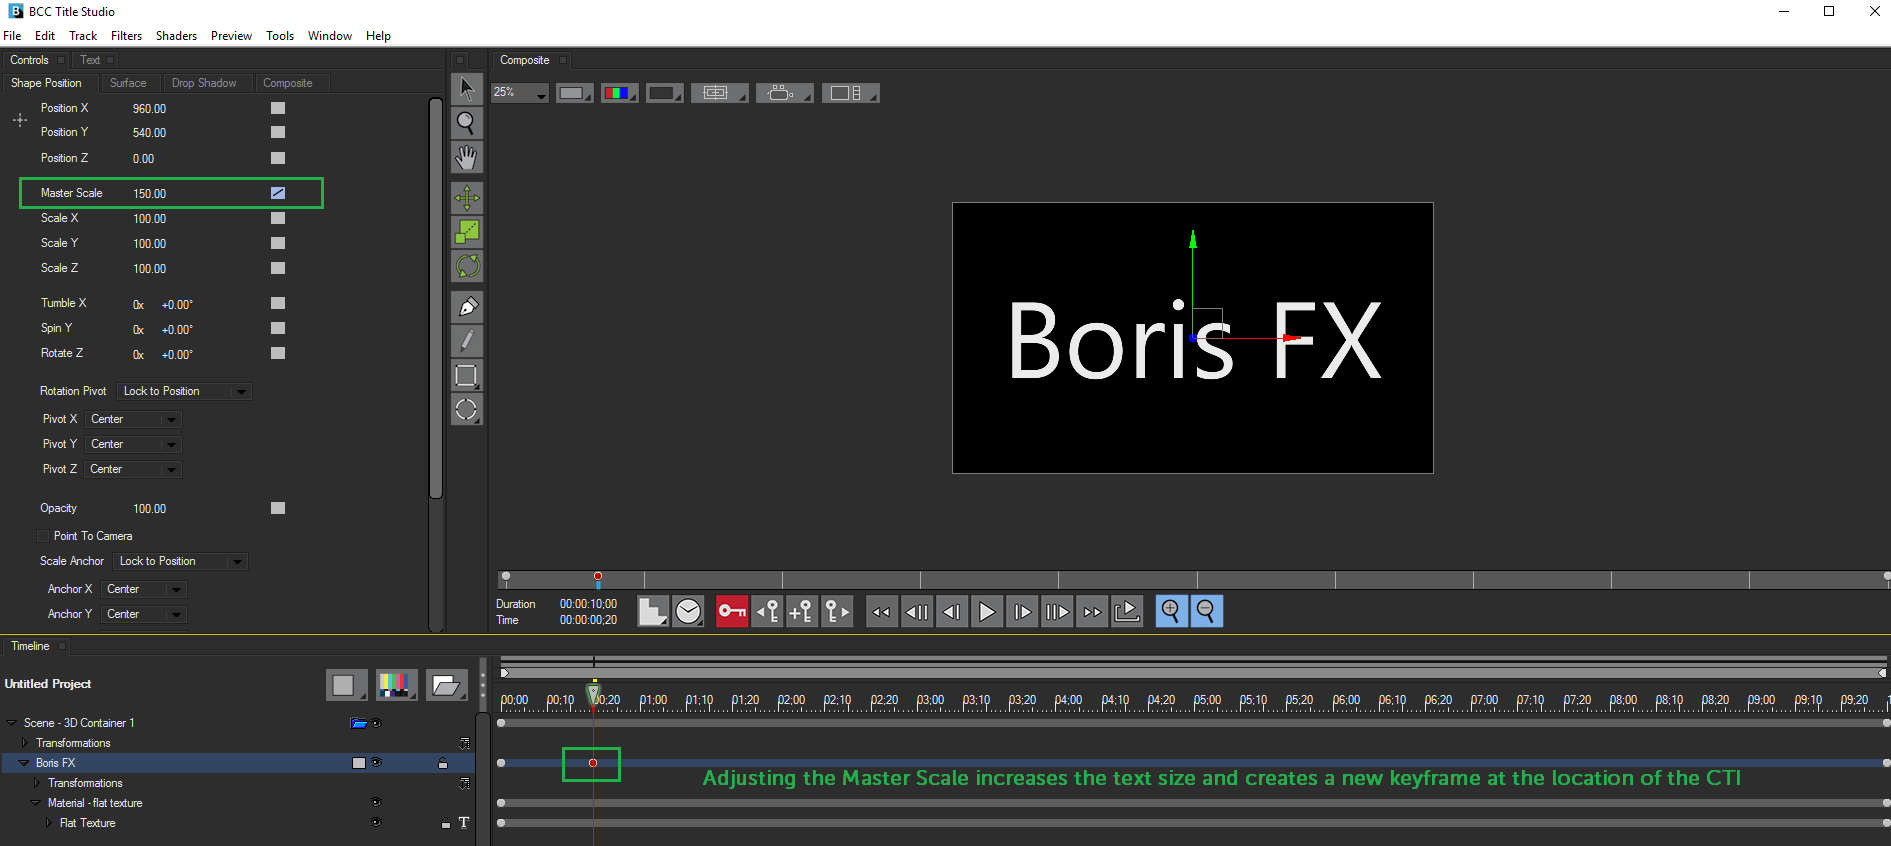
  3. With Go to the Shape Position tab in the Controls window.

  4. Change the Master Scale value to 150 by scrubing the numerical field or by click the numerical field, typing 150, and pressing Enter. A new keyframe will automatically be created at frame 20, and the text image is scaled to 150% of its original size. By default, the keyframe is set to Linear interpolation, meaning the effect will evenly animate between the two keyframes.

scale

  1. Click to select the new keyframe at frame 20. Remember, a selected keyframe is always displayed in red.

  2. Select the Interpolation field in the Master Scale controls. Change the interpolation by selecting Hold from the menu. If you play through the timeline, you will see that this type of interpolation causes the text scaling to come to a stop at frame 20. Feel free to experiment with different interpolation options to create unique effects.

  3. In the Shape Position tab, set Spin Y to 0 rotations and 180° by typing 180 and pressing Enter.

  4. Press the Interpolation field in the Spin Y controls. Choose Hold from the menu.

  5. Return the CTI to the beginning of the effect, either by dragging the CTI to the beginning or by pressing the Home key.

  6. Play the sequence by clicking the Play button in the Composite window or by pressing the Space bar. The text starts full size and facing outward, spins around and increases to 150% size by frame 20, then holds at that size and orientation for the remainder of the effect. Playback loops until you press the Space bar or Play button again.

Now, lets add animation to move the text off-screen.

  1. Select the Text track.

  2. You should see red, green and blue OpenGL interactors in your Composite window. If you don’t, press the G key or choose Preview > OpenGL Interactor > Show Interactor. The interactors should display arrows at their ends to indicate that you are in Translation mode. If they don’t, press the W key or choose Preview > OpenGL Interactor > Translation Interactor.

  3. Expand the text track by clicking the disclosure triangle to the left of the track name, then expand the Transformations track. Expand the Position track to reveal tracks that correspond to each parameter in the Position tab in the Controls window. The keyframes you set earlier in the exercise appear in the Scale Master and Spin Y tracks as shown in the following example.

  4. Move the CTI to frame 20 (Time 00:00:00:20).

  5. Select the Position X track, then choose Track > New Keyframe or type Control-N. A parameter keyframe appears in the Position X track at the CTI’s current position (Time 00:00:00:20). Use the same steps to create a new keyframe at that point in the Position Y and Position Z tracks. Your timeline should now appear similar to the following illustration.

  6. Move the CTI to the last frame in your effect (Time 00:00:06:00) and click the final keyframe for the text track. The keyframe turns red to show that it is selected. You may need to scroll up.

  7. Click the green interactor in the Composite window. The green interactor moves the image on the Y-axis. Make sure you click the interactor and not the text image. The shaft of the interactor turns yellow to indicate that it is selected.

  8. Drag the interactor down until the text is positioned in the lower right of the screen. In the Controls window, the value for Position Y updates. Stop dragging at a Position Y value of approximately 4,530. If you need to reduce the size of the preview scale you can choose a smaller scale from the Zoom Scale menu located in the top left of the Composite window.

  9. Click the red interactor and drag to the left until the text is offscreen. Make sure you click the interactor and not the text. The shaft of the interactor turns yellow to indicate that it is selected. In the Controls window, the value for Position X updates. Stop dragging at a Position X value of approximately 2,730.

  10. Click the blue interactor and drag downward until the text is positioned in the lower right corner. Make sure you click the interactor and not the text. The shaft of the interactor turns yellow to indicate that it is selected. In the Controls window, the value for Position Z updates. Stop dragging at a Position Z value of approximately 17,600.

  11. If you prefer, you can adjust the parameters in the Controls window by setting Position X to 4,530, Position Y to 2,730, and Position Z to 17,600 with the default Linear interpolation.

  12. Return the CTI to the beginning of the effect, and play the effect. The text now spins around and increases to 150% size by frame 20, and moves to the lower right of the screen by frame 180. Time 00:00:00:00 Time 00:00:00:20 Time 00:00:02:00


Viewing the Effect in 3D Space

When the composite window is defaulted to the render camera it may be difficult to see how your effect is moving in 3D space. We will cover working with multiple objects in 3D space in the next exercise, but for now, to get a better idea of where our text is positioned in 3D Space we can change the camera view to the world viewer.

To do this:

  1. Select the Camera Viewer toggle in the composite window

  2. From the drop down menu, select world view.

The world viewer depicts the scene in a fully 3D environment, similar to those seen in 3D modeling programs such as Cinema 4D. Most effects are not fully rendered in the world view, and it is typically used to aid in positioning objects in 3D Space.

By scrubbing the timeline, you can clearly see the animation path we created.

To return to the previous view, simply selected Render view from the Camera Viewer toggle.


Animating Other Objects in the Timeline

During this exercise we worked with a Flat Text track. Title Studio gives you the same ability to create animations ranging from simple to complex with a variety of objects.

By selecting the Add New Media Button in the timeline you can create an unlimited number of objects, such as:

  • Flat Text
  • Flat Text with 3D lighting
  • Extruded Text
  • Credit Rolls
  • Spline Objects
  • Spline Primitives
  • Adobe Illustrator EPS files
  • Images such as .jpg, .png, .tif and others
  • 3D models created in Cinema 4D
  • Flat color layers
  • Gradient layers
  • Video layers

Each of these can be animated in the same way shown in this example, and each object has it’s own unique parameters that can be keyframed to create an unlimited variety of animations. Experiment with different objects by keyframing their specific parameters to create unique animations.


Category:

BCC Particles

BCC Color & Tone

BCC Perspective

BCC Perspective

BCC Licensing

BCC Obsolete

BCC Key & Blend

BCC Obsolete

Nested Subgroup

BCC Art Looks

BCC Licensing

BCC Time

Nested Subgroup

BCC Image Restoration

BCC Transitions

BCC Blur & Sharpen

BCC Transitions

BCC Obsolete

BCC Textures

BCC Color & Tone

BCC Image Restoration

BCC Warp

BCC Art Looks

BCC Transitions

BCC Art Looks

BCC Art Looks

BCC Stylize

BCC Textures

BCC Art Looks

BCC Transitions

BCC Key & Blend

BCC Key & Blend

BCC Textures

BCC Textures

BCC Color & Tone

BCC Stylize

BCC Color & Tone

BCC Color & Tone

BCC Obsolete

BCC Color & Tone

BCC Stylize

BCC Transitions

BCC Particles

Uncategorized

Uncategorized

Nested Subgroup

BCC Key & Blend

BCC Key & Blend

BCC Transitions

BCC Match Move

BCC Match Move

BCC Color & Tone

BCC Transitions

BCC Transitions

BCC Transitions

BCC Transitions

BCC Transitions

BCC Perspective

BCC Warp

BCC Transitions

BCC Perspective

BCC Stylize

BCC Transitions

BCC Obsolete

BCC Film Style

BCC Obsolete

BCC Blur & Sharpen

BCC Warp

BCC Stylize

BCC Image Restoration

BCC Image Restoration

BCC Image Restoration

BCC Perspective

BCC Perspective

BCC Key & Blend

BCC Stylize

BCC Lights

Uncategorized

BCC Stylize

BCC 3D Objects

BCC 3D Objects

BCC 3D Objects

BCC Film Style

BCC Transitions

BCC Film Style

BCC Perspective

BCC Blur & Sharpen

BCC Film Style

BCC Obsolete

BCC Obsolete

BCC Film Style

BCC Obsolete

BCC Obsolete

BCC Image Restoration

BCC Transitions

BCC Textures

BCC Browser

BCC Blur & Sharpen

BCC Lights

BCC Lights

BCC Lights

BCC Stylize

BCC Obsolete

Nested Subgroup

BCC Textures

BCC Transitions

BCC Stylize

BCC Art Looks

BCC Color & Tone

BCC Color & Tone

BCC Time

BCC Time

BCC Transitions

BCC Lights

BCC 3D Objects

BCC Stylize

BCC Obsolete

BCC Transitions

BCC Image Restoration

BCC Transitions

BCC Lights

BCC Obsolete

BCC Transitions

BCC Transitions

BCC Transitions

BCC Transitions

BCC Blur & Sharpen

BCC Obsolete

BCC Color & Tone

BCC Lights

BCC Transitions

BCC Obsolete

BCC Lights

BCC Transitions

BCC Key & Blend

BCC Obsolete

BCC Lights

BCC Key & Blend

BCC Key & Blend

BCC Transitions

BCC Time

BCC Image Restoration

BCC Key & Blend

BCC Film Style

BCC Match Move

BCC Key & Blend

BCC Key & Blend

BCC Art Looks

BCC Stylize

BCC Textures

BCC Warp

BCC Stylize

BCC Blur & Sharpen

BCC Image Restoration

Nested Subgroup

Nested Subgroup

Nested Subgroup

Nested Subgroup

Nested Subgroup

Nested Subgroup

Nested Subgroup

Nested Subgroup

Nested Subgroup

BCC Stylize

BCC Transitions

BCC Transitions

BCC Color & Tone

BCC Obsolete

BCC Textures

BCC Image Restoration

BCC Time

BCC Image Restoration

BCC Particles

Uncategorized

Uncategorized

Uncategorized

Uncategorized

BCC Perspective

BCC Perspective

BCC Particles

BCC Particles

BCC Particles

BCC Transitions

BCC Particles

BCC Art Looks

BCC Particles

Nested Subgroup

Nested Subgroup

BCC Image Restoration

Nested Subgroup

BCC Warp

BCC Art Looks

BCC Time

BCC Key & Blend

BCC Key & Blend

BCC Stylize

BCC Transitions

BCC Blur & Sharpen

BCC Blur & Sharpen

BCC Transitions

BCC Particles

BCC Lights

BCC Transitions

BCC Lights

BCC Lights

BCC Lights

BCC Lights

BCC Lights

BCC Lights

BCC Lights

BCC Lights

BCC Transitions

BCC Stylize

BCC Image Restoration

BCC Image Restoration

BCC Textures

BCC Lights

BCC Key & Blend

BCC Transitions

BCC Transitions

BCC Stylize

BCC Stylize

BCC Transitions

BCC Transitions

BCC Warp

BCC Transitions

BCC Textures

BCC Obsolete

BCC Color & Tone

BCC Stylize

BCC Stylize

BCC Obsolete

BCC Image Restoration

BCC Particles

BCC Particles

BCC Perspective

BCC Transitions

BCC Key & Blend

BCC Transitions

BCC Blur & Sharpen

BCC Lights

BCC Art Looks

BCC Lights

BCC Obsolete

BCC Textures

BCC Textures

BCC Obsolete

BCC Transitions

BCC Time

BCC Transitions

BCC Art Looks

BCC Transitions

BCC Time

BCC 3D Objects

BCC Time

BCC Time

BCC Color & Tone

BCC Transitions

BCC Warp

BCC Warp

BCC Transitions

BCC Film Style

BCC Key & Blend

BCC 3D Objects

BCC Blur & Sharpen

BCC Image Restoration

Uncategorized

BCC Transitions

BCC Warp

BCC Textures

BCC Time

BCC Stylize

BCC Warp

BCC Color & Tone

BCC Film Style

BCC Transitions

BCC VR

BCC VR

BCC VR

BCC VR

BCC VR

BCC Warp

BCC Art Looks

BCC Transitions

BCC Warp

BCC Textures

BCC Particles

BCC Image Restoration

BCC Match Move

BCC Textures

BCC Textures

BCC Obsolete

BCC Obsolete

BCC Obsolete

BCC Blur & Sharpen

BCC Image Restoration

BCC Blur & Sharpen

BCC Transitions

BCC Blur & Sharpen

BCC Transitions

BCC Blur & Sharpen

BCC Key & Blend

BCC Transitions

BCC Transitions

BCC Blur & Sharpen

BCC Transitions

BCC Transitions

BCC Color & Tone

BCC Film Style

BCC Transitions

BCC Film Style

BCC Film Style

BCC Color & Tone

BCC Color & Tone

BCC Lights

BCC Transitions

BCC Image Restoration

BCC Transitions

BCC Stylize

BCC Transitions

BCC Transitions

BCC Blur & Sharpen

BCC Transitions

BCC Blur & Sharpen

BCC Transitions

BCC Film Style

BCC Stylize

BCC Lens

BCC Lights

BCC Color & Tone

BCC Film Style

BCC Art Looks

BCC Lens

BCC Optical Diffusion

BCC Lights

BCC Lens

BCC Grads and Tints

BCC Art Looks

BCC Key & Blend

BCC Art Looks

BCC Grads and Tints

BCC Grads and Tints

BCC Film Style

BCC Film Style

BCC Image Restoration

BCC Image Restoration

BCC Color & Tone

BCC Lens

BCC Optical Diffusion

BCC Blur & Sharpen

BCC Color & Tone

BCC Optical Diffusion

BCC Optical Diffusion

BCC Grads and Tints

BCC Key & Blend

BCC Color & Tone

BCC Lights

BCC Film Style

BCC Optical Diffusion

BCC Optical Diffusion

BCC Grads and Tints

BCC Lights

BCC Lights

BCC Lights

BCC Color & Tone

BCC Optical Diffusion

BCC Art Looks

BCC Color & Tone

BCC Key & Blend

BCC Lights

BCC Art Looks

BCC Color & Tone

BCC Lights

BCC Lens

BCC Lights

BCC Lights

BCC Film Style

BCC Color & Tone

BCC Key & Blend

BCC Optical Diffusion

BCC Grads and Tints

BCC Optical Diffusion

BCC Art Looks

BCC Key & Blend

BCC Key & Blend

BCC Lights

BCC Grads and Tints

BCC Color & Tone

BCC Optical Diffusion

BCC Lens

BCC Grads and Tints

BCC Lights

BCC Lights

BCC Lights

BCC Color & Tone

BCC Grads and Tints

BCC Color & Tone

BCC Optical Diffusion

BCC Grads and Tints

BCC Optical Diffusion

BCC Grads and Tints

BCC Lights

BCC Grads and Tints

BCC Textures

BCC Film Style

BCC Grads and Tints

BCC Perspective

BCC Transitions

BCC Lens

BCC Art Looks

Title Studio

Title Studio

Title Studio

Title Studio

Title Studio

Title Studio

Title Studio

BCC 3D Objects

Tutorial

Tutorial

Tutorial

Tutorial

Tutorial

Tutorial

Tutorial

Tutorial

Tutorial

Tutorial

Tutorial

Title Studio

Title Studio

Title Studio

Title Studio

Title Studio

Title Studio

Title Studio

Title Studio

Title Studio

Title Studio

Title Studio

Title Studio

Tutorial

Title Studio

Title Studio

Title Studio

Title Studio

Title Studio

Title Studio

Title Studio

Title Studio

Title Studio

Tutorial

Effect:
BCC 2D Particles
BCC 3 Way Color Grade
BCC 3D Extruded Image Shatter
BCC 3D Image Shatter
BCC AE Licensing
BCC Alpha Pixel Noise
BCC Alpha Process
BCC Alpha Spotlight
BCC Apply Modes
BCC Artists Poster
BCC AVX Licensing
BCC Beat Reactor
BCC Beat Reactor Integrated
BCC Beauty Studio
BCC Blobs Wipe
BCC Blur
BCC Blur Dissolve
BCC Boost Blend
BCC Brick
BCC Brightness-Contrast
BCC Broadcast Safe
BCC Bulge
BCC Bump Map
BCC Burnt Film
BCC Cartoon Look
BCC Cartooner
BCC Cast Shadow
BCC Caustics
BCC Charcoal Sketch
BCC Checker Wipe
BCC Chroma Key
BCC Chroma Key Studio
BCC Cloth
BCC Clouds
BCC Color Balance
BCC Color Choker
BCC Color Correction
BCC Color Match
BCC Color Palette
BCC Colorize
BCC Colorize Glow
BCC Colorize Glow Dissolve
BCC Comet
BCC Common Controls
BCC Common Controls - Avid
BCC Compare Mode
BCC Composite
BCC Composite Choker
BCC Composite Dissolve
BCC Corner Pin
BCC Corner Pin Studio
BCC Correct Selected Color
BCC Crash Zoom Dissolve
BCC Criss-Cross Wipe
BCC Cross Glitch
BCC Cross Melt
BCC Cross Zoom
BCC Cube
BCC Curl
BCC Curl Dissolve
BCC Cylinder
BCC Damaged TV
BCC Damaged TV Dissolve
BCC DeGrain
BCC Deinterlace
BCC DeNoise
BCC Directional Blur
BCC Displacement Map
BCC Drop Shadow
BCC Dropout Fixer
BCC Dust and Scratches
BCC Dv Fixer
BCC DVE
BCC DVE Basic
BCC Edge Cleaner
BCC Edge Grunge
BCC Edge Lighting
BCC Effects List
BCC Emboss
BCC Extruded EPS
BCC Extruded Spline
BCC Extruded Text
BCC FAQ
BCC Fast Film Glow
BCC Fast Film Glow Dissolve
BCC Fast Film Process
BCC Fast Flipper
BCC Fast Lens Blur
BCC Film Damage
BCC Film Glow
BCC Film Glow Dissolve
BCC Film Grain
BCC Film Process
BCC Fire
BCC Flicker Fixer
BCC Flutter Cut
BCC Fractal Noise
BCC FX Browser
BCC Gaussian Blur
BCC Glare
BCC Glint
BCC Glitter
BCC Glow Alpha Edges
BCC Glow Matte
BCC Gradient
BCC Granite
BCC Grid Wipe
BCC Grunge
BCC Halftone
BCC Hue-Sat-Lightness
BCC Invert Solarize
BCC Jitter
BCC Jitter Basic
BCC Kaleida Dissolve
BCC Laser Beam
BCC Layer Deformer
BCC LED
BCC Lens Blur
BCC Lens Blur Dissolve
BCC Lens Correction
BCC Lens Distortion Wipe
BCC Lens Flare 3D
BCC Lens Flare Advanced
BCC Lens Flare Dissolve
BCC Lens Flare Round
BCC Lens Flare Spiked
BCC Lens Flash
BCC Lens Shape
BCC Lens Transition
BCC Levels Gamma
BCC Light Leaks
BCC Light Leaks Dissolve
BCC Light Matte
BCC Light Sweep
BCC Light Wipe
BCC Light Wrap
BCC Light Zoom
BCC Lightning
BCC Linear Color Key
BCC Linear Luma Key
BCC Linear Wipe
BCC Looper
BCC Magic Sharp
BCC Make Alpha Key
BCC Match Grain
BCC Match Move
BCC Matte Choker
BCC Matte Cleanup
BCC Median
BCC Misalignment
BCC Mixed Colors
BCC Morph
BCC Mosaic
BCC Motion Blur
BCC Motion Key
BCC Motion Tracker
BCC Motion Tracker AE
BCC Motion Tracker Avid
BCC Motion Tracker FCP
BCC Motion Tracker Motion
BCC Motion Tracker PRM
BCC Motion Tracker Red
BCC Motion Tracker Resolve
BCC Motion Tracker Vegas
BCC Multi Shadow
BCC Multi Stretch Wipe
BCC Multi Stripe Wipe
BCC MultiTone Mix
BCC Noise Map
BCC Noise Map 2
BCC Noise Reduction
BCC Optical Flow
BCC Optical Stabilizer
BCC Organic Strands
BCC Overview in Adobe
BCC Overview in Avid
BCC Overview in FCP
BCC Overview in Resolve
BCC Page Turn
BCC Pan And Zoom
BCC Particle Array 3D
BCC Particle Emitter 3D
BCC Particle Illusion
BCC Particle Illusion Dissolve
BCC Particle System
BCC Pencil Sketch
BCC Pin Art 3D
BCC Pinning Controls
BCC Pixel Chooser
BCC Pixel Fixer
BCC PixelChooser – Legacy
BCC Polar Displacement
BCC Posterize
BCC Posterize Time
BCC Preferences
BCC Premult
BCC Presets
BCC Primatte Studio
BCC Prism
BCC Prism Dissolve
BCC Pyramid Blur
BCC Radial Blur
BCC Radial Wipe
BCC Rain
BCC Rays Cartoon
BCC Rays Dissolve
BCC Rays Puffy
BCC Rays Radiant Edges
BCC Rays Radiant Spotlight
BCC Rays Ring
BCC Rays Ripply
BCC Rays Streaky
BCC Rays Textured
BCC Rays Wedge
BCC Rectangular Wipe
BCC Reflection
BCC Reframer
BCC Remover
BCC Reptilian
BCC Reverse Spotlight
BCC RGB Blend
BCC RGB Blur Dissolve
BCC RGB Displacement Dissolve
BCC RGB Edges
BCC RGB Pixel Noise
BCC Ribbon Wipe
BCC Rings Wipe
BCC Ripple
BCC Ripple Dissolve
BCC Rock
BCC Rough Glow
BCC Safe Colors
BCC Scanline
BCC Scatterize
BCC Sequencer
BCC Smooth Tone
BCC Snow
BCC Sparks
BCC Sphere
BCC Sphere Transition
BCC Spill Remover
BCC Spin Blur Dissolve
BCC Spiral Blur
BCC Spotlight
BCC Spray Paint Noise
BCC Stage Light
BCC Star Matte
BCC Stars
BCC Steel Plate
BCC Super Blend
BCC Swish Pan
BCC Temporal Blur
BCC Textured Wipe
BCC Tile Mosaic
BCC Tile Wipe
BCC Time Displacement
BCC Title Studio
BCC Trails
BCC Trails Basic
BCC Tritone
BCC Tritone Dissolve
BCC Turbulence
BCC Twirl
BCC Twister
BCC Two Strip Color
BCC Two Way Key
BCC Type On Text
BCC Unsharp Mask
BCC UpRez
BCC User Guide
BCC Vector Blur Dissolve
BCC Vector Displacement
BCC Veined Marble
BCC Velocity Remap
BCC Video Glitch
BCC Video Morph
BCC VideoScope
BCC Vignette
BCC Vignette Wipe
BCC VR Blur
BCC VR Flicker Fixer
BCC VR Insert
BCC VR Reorient
BCC VR Sharpen
BCC Warp
BCC Water Color
BCC Water Waves Dissolve
BCC Wave
BCC Weave
BCC Wild Cards
BCC Wire Remover
BCC WitnessProtection
BCC Wood Grain
BCC Wooden Planks
BCC Z Space I
BCC Z Space II
BCC Z Space III
BCC Z-Blur
BCC+ Beauty Studio
BCC+ Blur
BCC+ Camera Shake Dissolve
BCC+ Channel Blur
BCC+ Channel Blur Dissolve
BCC+ Channel Blur YUV
BCC+ Composite
BCC+ Crash Zoom Dissolve
BCC+ Cross Zoom Dissolve
BCC+ Directional Blur
BCC+ Directional Blur Dissolve
BCC+ Dissolve
BCC+ F-Stop
BCC+ Film Glow
BCC+ Film Glow Dissolve
BCC+ Film Grunge
BCC+ Flashing
BCC+ Fluorescent
BCC+ Haze
BCC+ Light Leaks
BCC+ Light Leaks Dissolve
BCC+ Magic Sharp
BCC+ Multi-Star Dissolve
BCC+ Prism
BCC+ Prism Dissolve
BCC+ Rack Focus Dissolve
BCC+ Radial Blur
BCC+ Rays Dissolve
BCC+ Smear Blur
BCC+ Spin Blur Dissolve
BCC+ Two Strip
BCC+ Video Glitch
BCC+ Vignette
BCC+Ambient Light
BCC+Black and White
BCC+Bleach Bypass
BCC+Borders
BCC+Camera Shake
BCC+Center Spot
BCC+Chroma Bands
BCC+Chromatic Aberration
BCC+Color Gradient
BCC+Color Infrared
BCC+Color Paste
BCC+Color Shadow
BCC+Color Spot
BCC+Colorize Gradient
BCC+Cross Processing
BCC+Day for Night
BCC+DeBand
BCC+DeBlock
BCC+Defog
BCC+DeFringe
BCC+Depth of Field
BCC+Detail
BCC+Develop
BCC+Diffusion
BCC+Double Fog
BCC+Dual Gradient
BCC+Edge Composite
BCC+Enhancing
BCC+Eye Light
BCC+Film Stocks
BCC+Fog
BCC+Frost
BCC+FX-Editor
BCC+Gels
BCC+Glow
BCC+Glow Darks
BCC+Glow Edges
BCC+Grade
BCC+Halo
BCC+Harris Shutter
BCC+High Contrast
BCC+Holdout Composite
BCC+Ice Halos
BCC+Infrared
BCC+Kelvin
BCC+Key Light
BCC+Lens Distortion
BCC+Lens Flare
BCC+Light
BCC+Looks
BCC+Low Contrast
BCC+Math Composite
BCC+Mist
BCC+ND Gradient
BCC+Net
BCC+Night Vision
BCC+Non-Additive Mix
BCC+Optical Dissolve
BCC+Overexpose
BCC+Photographic
BCC+Polarizer
BCC+Rack Focus
BCC+Radial Exposure
BCC+Radial Tint
BCC+Rays
BCC+Reflector
BCC+ReLight
BCC+Selective Saturation
BCC+Sepia
BCC+Shadows/Highlights
BCC+Silk
BCC+Skin Tone
BCC+Split Field
BCC+Split Tone
BCC+Streaks
BCC+Sunset
BCC+Textures
BCC+Three Strip
BCC+Tint
BCC+Transform
BCC+Video Glitch Dissolve
BCC+Wide Angle Lens
BCC+X-Ray
Removed Gradient Parameters
Title Studio - The Title Container Parameter Guide
Title Studio Basics
Title Studio- Animating an Object Using Keyframes
Title Studio- Creating a Credit Roll
Title Studio- Creating a Credit Roll Part Two
Title Studio- Creating A Fade Effect
Title Studio- Creating a Type on Effect with Title Containers
Title Studio- Creating an Animated Lower Third
Title Studio- Image Processors
Title Studio- Image Processors - Blur Shaders
Title Studio- Image Processors - Glow Shaders
Title Studio- Image Processors - Gradient Shaders
Title Studio- Image Processors - Key Shaders
Title Studio- Image Processors - Light Rays
Title Studio- Image Processors - Light Sweep
Title Studio- Image Processors - Scan Lines
Title Studio- Image Processors - Spotlight
Title Studio- Image Processors - Wipe Shaders
Title Studio- Image Processors- Linear Ripple
Title Studio- Keyframe Palette
Title Studio- Scene Container Parameter Guide
Title Studio- The Animation Tab
Title Studio- The Camera Tab
Title Studio- The Composite Tab
Title Studio- The Container Position Tab
Title Studio- The History Palette
Title Studio- The Info Window
Title Studio- The Lights Tab
Title Studio- The Preferences Panel
Title Studio- The Project Settings Window
Title Studio- The Render Tab
Title Studio- The Text Tool
Title Studio- The Tools Window
Title Studio- The User Marks Window
Title Studio- Understanding Track Structure
Title Studio- Working With Deformers
Title Studio- Working With Image Processor Shaders
Title Studio- Working With Spline Media
Title Studio- Working with the Composite Window
Title Studio- Working with the Controls Window
Title Studio- Working with the Timeline Window
Working in Vegas Pro

PRODUCT UPDATES & SPECIAL OFFERS

Join our email newsletter and keep up to date